MemberShops Documentation
Introduction
Introduction
Introduction
There are 3 major admin areas in maintaining your shop:
1. Shop area - responsible for management of your shop products, accessible at https://plr.pub/login where you can:
- publish and manage products
- create and manage categories
- create and manage niches
- create and manage product terms
- create and manage listing pages
- manage comments
2. Membership administration area - responsible for management of your clients and payments. This is done using aMember, accessible via https://your-shop-domain.com/members/admin (replace your-shop-domain.com with your actual domain name). Here's what you can do in membership administration area:
- view and manage your users/clients
- create membership plans for your users to subscribe to (for example, monthly membership, 3-month membership, yearly membership and so on...)
- manage payments and invoices
- manage helpdesk tickets
- manage affiliate program
- and much more, you can view the features of aMember by clicking on its link above.
Make sure that you read aMember's FULL documentation after going through our own documentation, so you can fully grasp all of the features it comes with:
3. WordPress area - responsible for management of your shop look and feel, accessible at https://your-shop-domain.com/wp-admin (replace your-shop-domain.com with your actual domain name) where you can:
- manage your shop design via Divi website builder
- manage the content of your pages (landing/sales pages, contact page, etc.)
- install WordPress plugins
Here's a list of the steps that we recommend you take upon the installation of your shop.
The recommended first step is to change your shop logo and that has to be done in 3 places. Check the video below on how to do that:
To accept the payments from your users you need to set up a payment processor. This is done in aMember administration area. The steps can be a little different depending on the payment processor that you decide to use. Check out the written instructions for PayPal or watch the video tutorials below.
Your shop comes with 6 predefined plans (free, 1 month, 3 months, 6 months, 1 year and 2 years membership). You can disable the plans you don’t want to use. This is done in membership administration area.
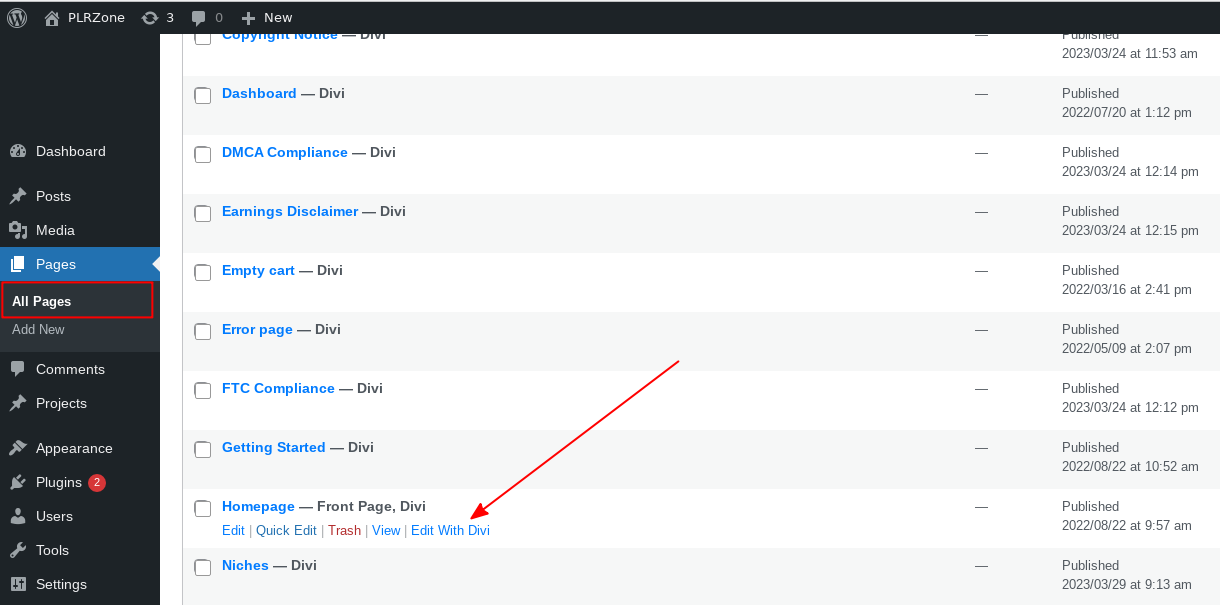
Your website content like homepage, TOS, contact details are managed via WordPress DIVI website builder. This is done via WP area. For example, to edit your homepage visit Pages on the left menu, pass the mouse over the Homepage and then click on Edit With Divi link. See the screenshot below.
To edit footer and header, see the following video.
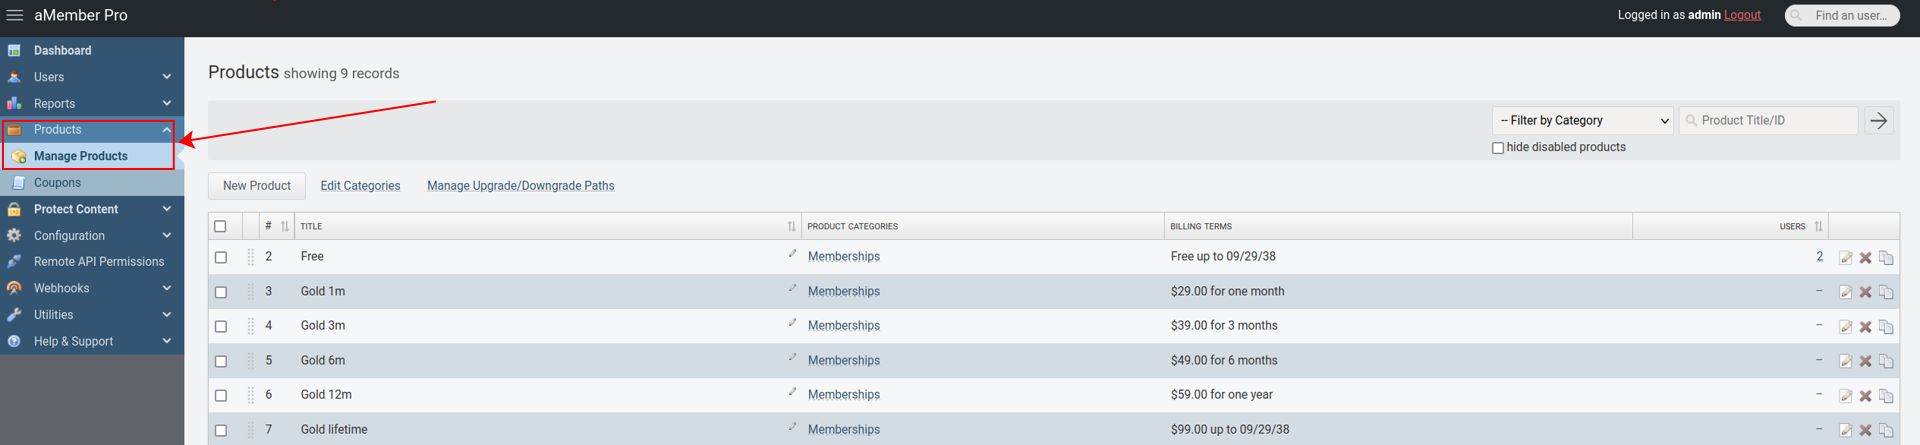
To submit a new product or edit current ones, you should go to your plr.pub shop area.
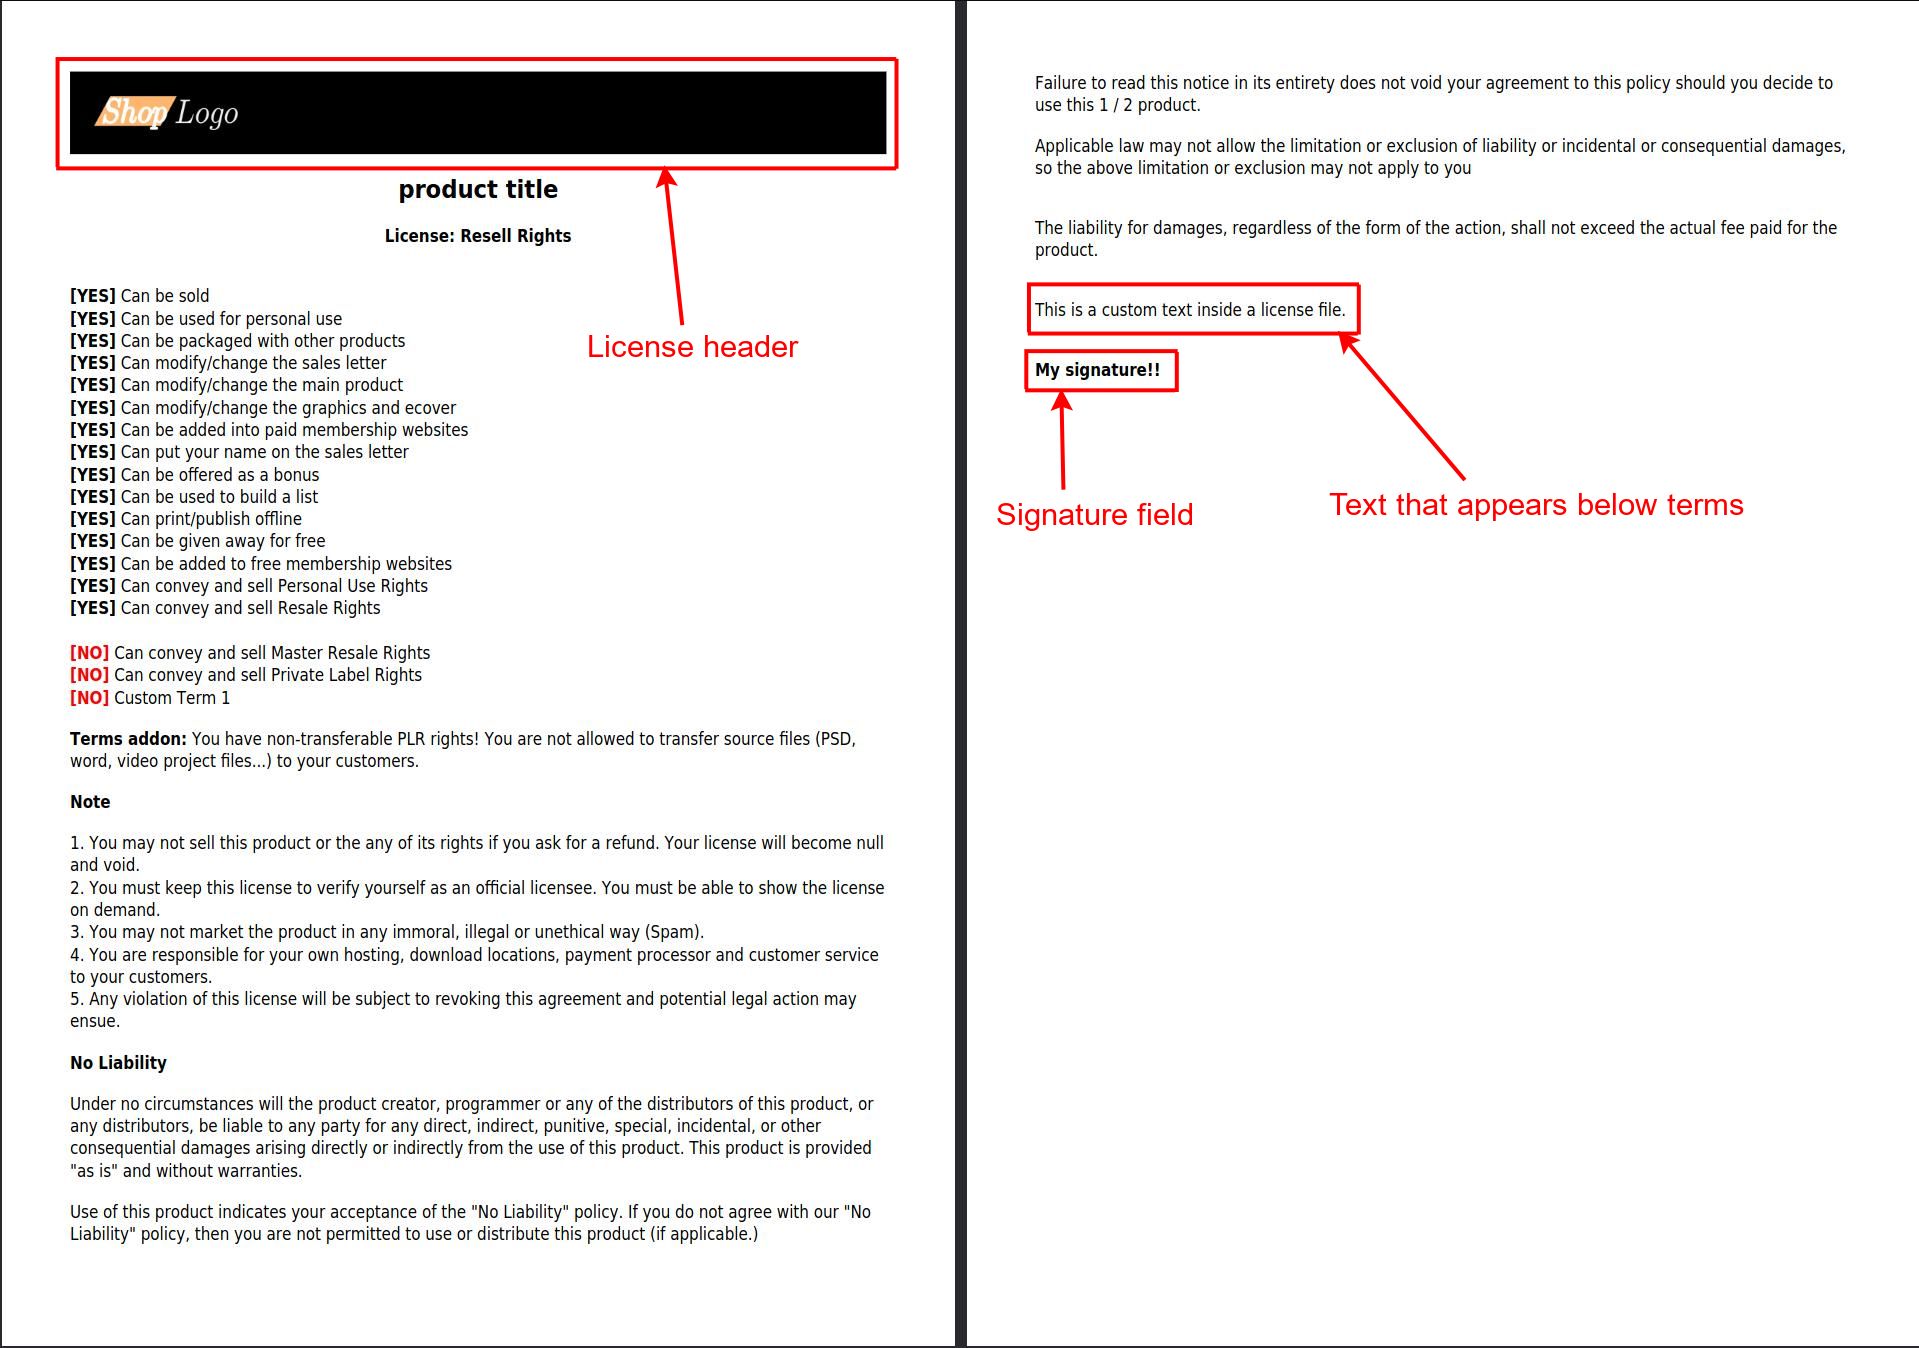
Every product which your users download from your shop comes with pdf license inserted inside. It contains your logo and predefined text. You can change some of the text to better suit your brand. To do that, check here.
First, select the "License" menu from the sidebar. Next, modify your license file the way you want to. You can change the license header background, change your shop logo and select different fonts.
After making those modifications, you should then enter your custom text that is going to appear below the terms generated by each product. You can also add your custom signature to the license file, which can be text or you could even upload your signature image.
Once you are done making the changes, you can either preview them by clicking on the "Preview" button or save them immediately by clicking on the "Save" button.

Let's see what our license looks like:
aMember comes with built-in help-desk where your users can submit support tickets. You can activate the help-desk by following the instructions here.
By default, the helpdesk is activated upon the installation of your shop and the button to send a helpdesk ticket has been added to the footer of the website.
aMember also comes with built-in affiliate program where you can entice the users to promote your website by providing a commission for each sale they make. You can learn more about affiliate program here.