MemberShops Documentation
Managing listing pages
Managing listing pages
Managing listing pages
Listing pages serve as containers for products on your website, enabling you to present them in an organized manner. Think of listings as categories or groups that help you structure your products effectively.
For example, some of the listing pages on indigitalworks.com are:
Ebooks with resell rights - a listing page which lists only eBooks containg resell rights licenses
Software with resell rights - listing page that lists only Software with resell rights
Latest Releases - listing page which shows 100 latest products
... and so on.
When publishing a product, you need to define certain aspects:
- Product category: Specify whether it is an ebook, software, videos, templates, etc.
- Product niche: Determine the marketing, business, weight loss, fitness, or other relevant niche.
- Product terms: Indicate if it is PLR, MRR, or any other applicable terms.
These selections primarily contribute to the backend organization of your products. However, it is the frontend organization, visible to your users, where product listing pages come into play.
Product listings allow you to create various lists of products based on specific criteria and showcase them on your shop frontend for browsing and downloading.
For instance, you can create a product listing dedicated to ebooks from the marketing niche. Moreover, you can create more specific listing pages, such as ebooks from marketing niche containing specific terms, submission date, size, price, and more.
After creating and saving a listing page, you will receive a shortcode. This shortcode can be pasted anywhere on your WordPress page, and it will display a list of all products that meet the criteria.
With listing pages, you have the flexibility to organize products on your website according to your goals and target audience.
Manual listings: These contain products that you manually select. They remain unchanged unless some products are unpublished or deleted. Manual listings are ideal for presenting a fixed list of products, such as a sidebar list of your chosen products.
Filtered listings: These contain products that satisfy specific filter rules set on the listing. Unlike manual listings, you do not select products individually; they are shown or hidden based on whether they satisfy the filter rules. Filtered listings are suitable for dynamic listings that automatically adjust based on product attributes.
You can create filter rules based on various attributes such as categories, niches, terms, price, publishing date, presence of a sales page, and featured status.
Additionally, if you enable the "Add new products to this page automatically" feature, your filtered listings will be automatically updated with new products. However, if this feature is not enabled, new products will not be added to the listing automatically.
Furthermore, you have control over the paging, sorting, and limit options for your listings. You can specify the number of products to display per page, define the sorting order, and set a maximum limit for the number of products in your listings.
Lastly, you have the flexibility to optimize your listing page for search engines. You can modify the window title, meta description, and meta keywords to enhance the visibility of your page in search engine results.
Watch the following video tutorial that explains the whole process of creating a listing page. Alternatively, you can read the written tutorial below the video.
You can manage your listing pages in the plr.pub administration application. First, log in to your https://plr.pub account, and click the "Listings" sidebar menu.
Depending on your chosen membership type, you may have listings already created for you. There will be 32 listings in total with most of those listings being automatically created based on the categories and niches we have setup. The listings will be named accordingly so you know exactly which products they include.
There will also be a couple of additional listings, mainly "Free products" and 2 versions of "Latest products".
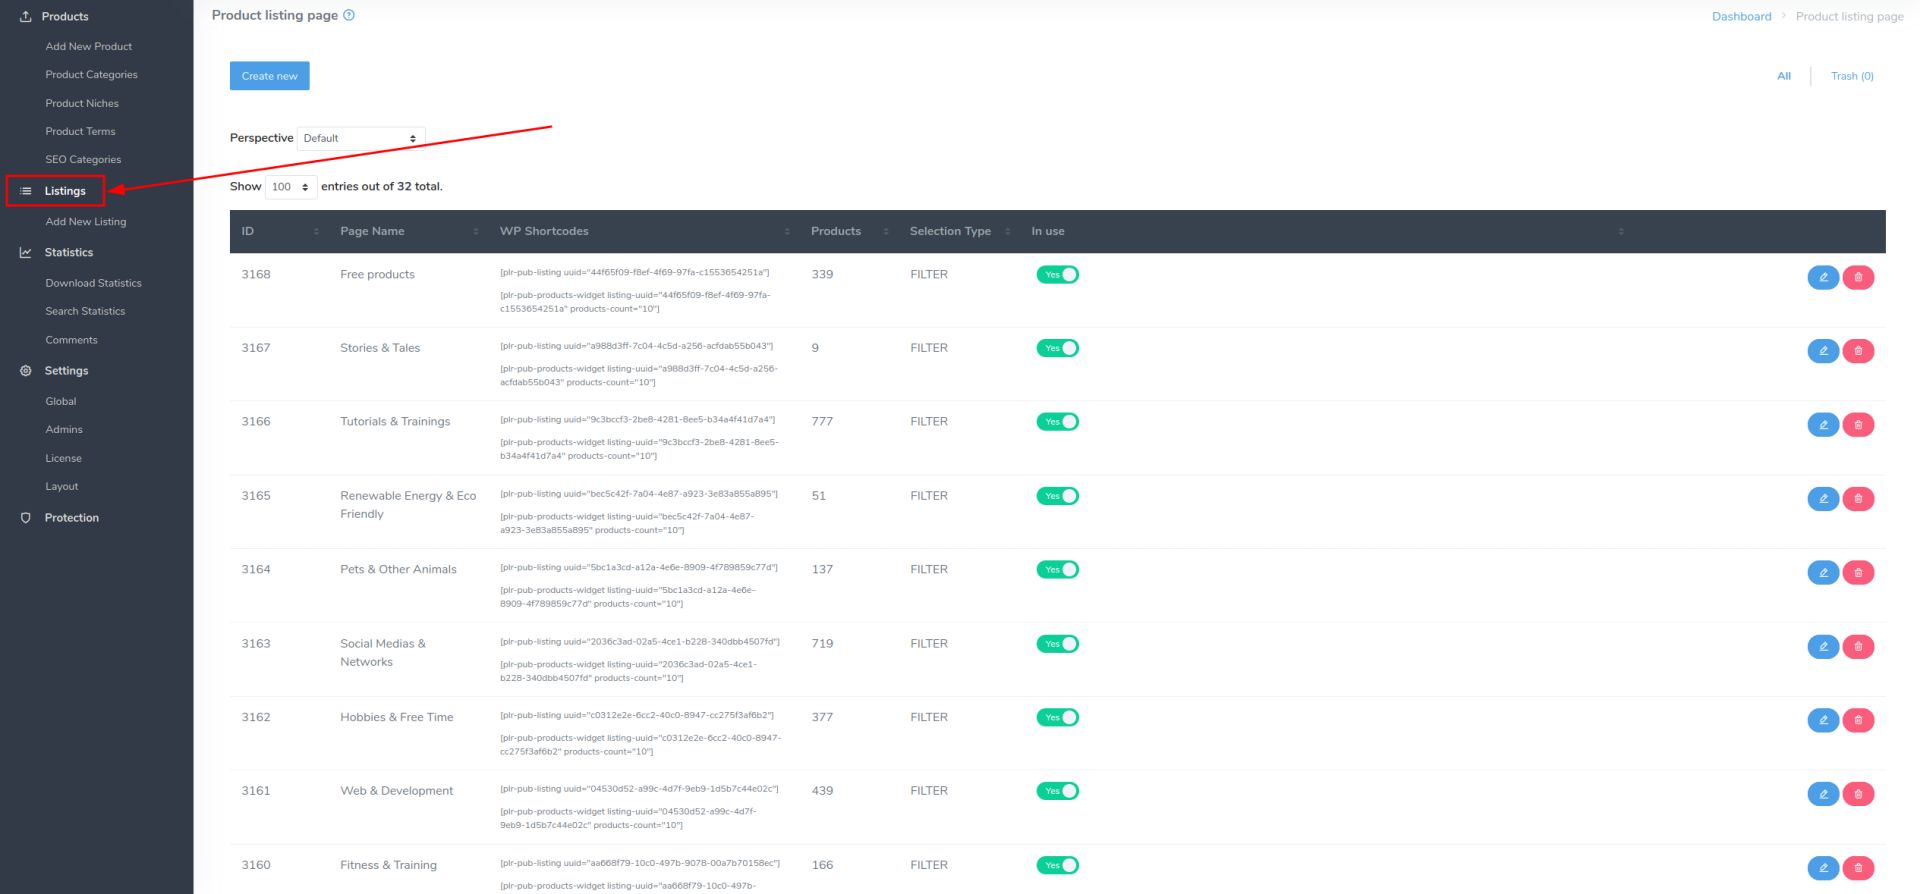
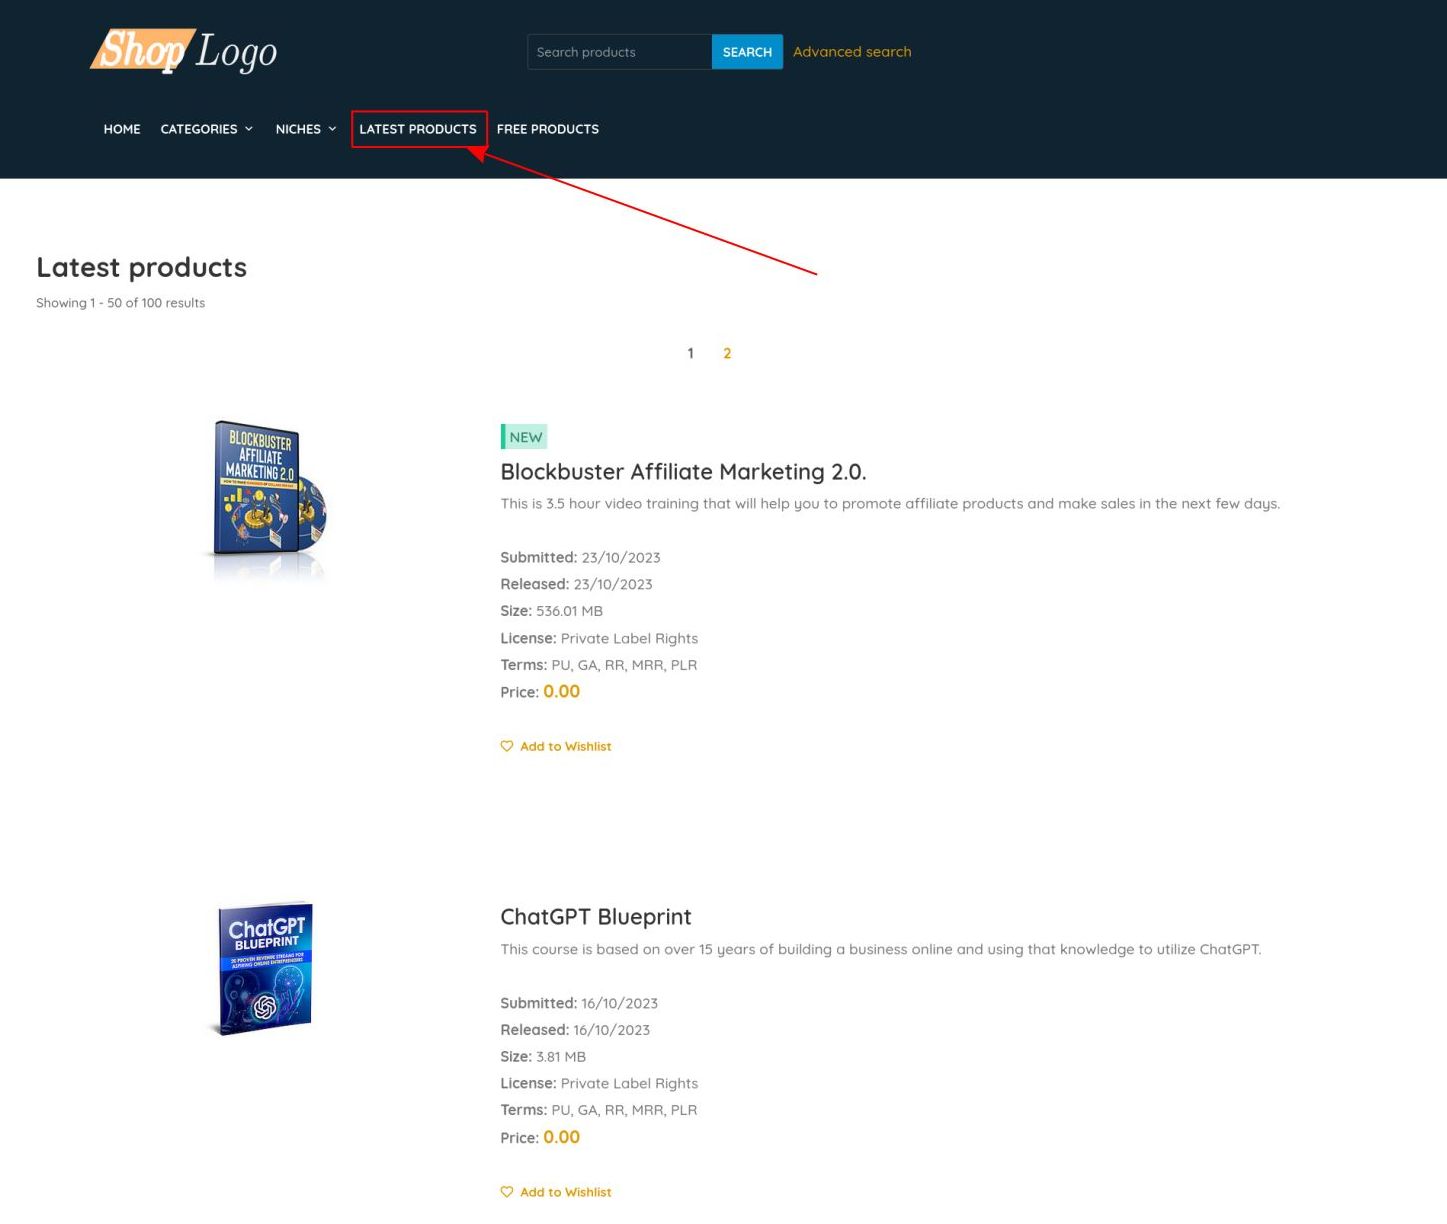
Those listings are already visible on your newly created website and the links leading to them are put immediately in your website's header menu. Click on any listing to see what it looks like.
You can create as many listing pages as you wish, organizing them in different fashions. To create a new listing click the "Create new" button.

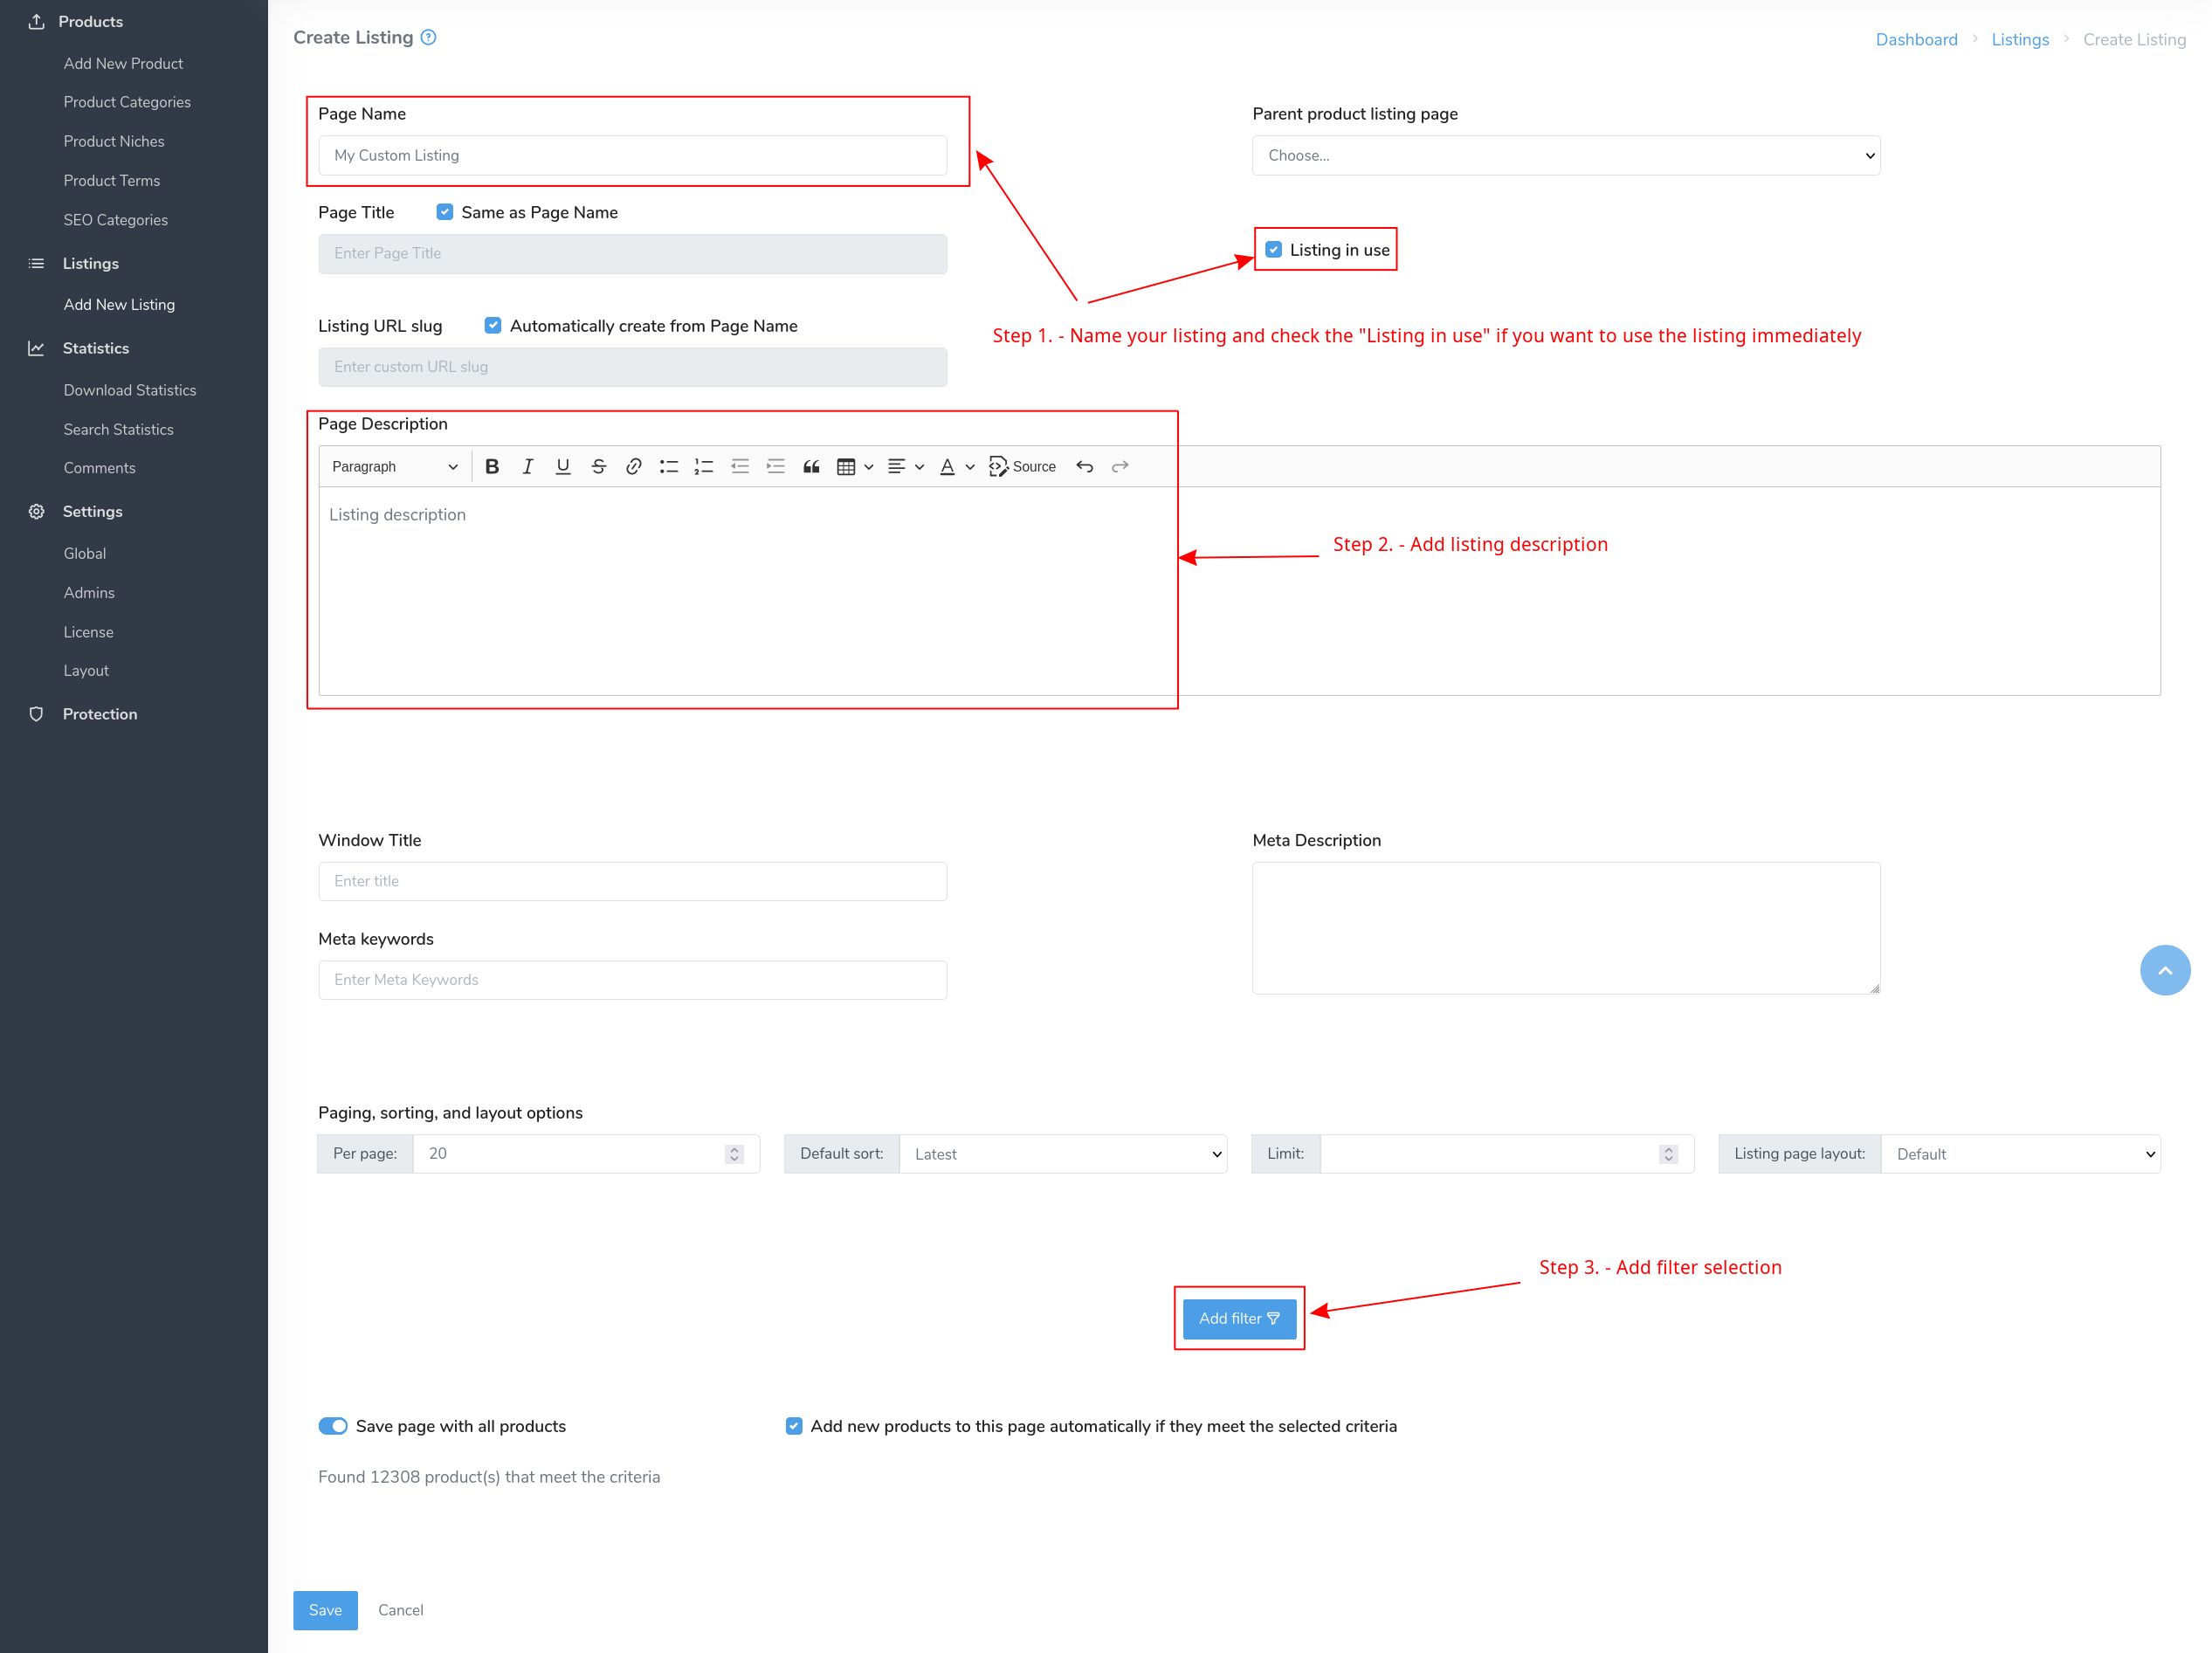
Create listing page will show up. First, you have to enter the page name, check the listing in-use checkbox, and fill in the page metadata like title, keywords, and description if you wish.
Below you can select different filter criteria to add products to the listing page. You can filter products based on the category and niche they're in or product terms they have.
Next, you can filter products by price, date of publication, whether they have a sales page or not, and whether they are featured or not.
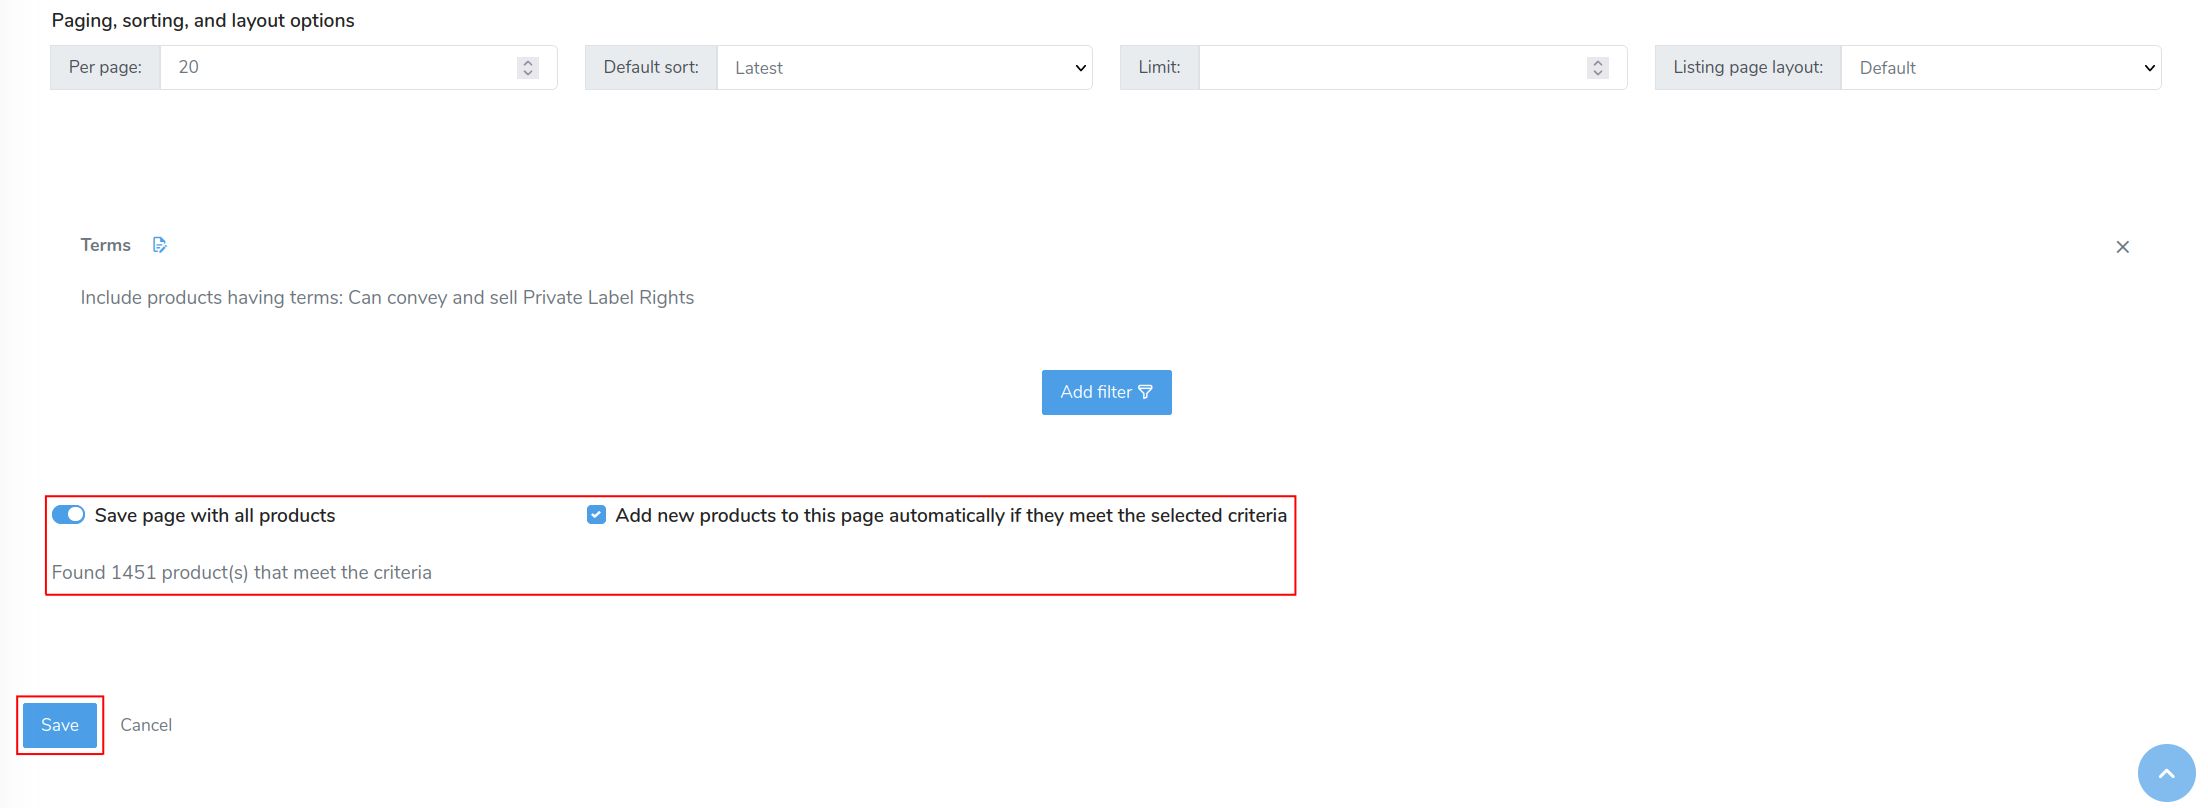
After you finish filtering the products you have two options. You can save all filtered products you've found with an option to add new products automatically.

Or, you can leave the "Save page with all products" unchecked, and scroll down to the products table and check them manually. This way, you will add products manually and the listing page will consist only of what you've selected.

The listing page also has paging, sorting, and limiting options where you can select how many products should be shown per page, and set the limit, e.g. you want only the ten newest products. Please note that the limit only works if you check the "Save page with all products" checkbox. If you select products manually, the limit is not applicable.

Now, let's create a sample listing page. We will call it "My Custom Listing", add a description and check the "Listing in use" since we want to use the listing immediately. Finally, we want to add a filter for the products we want to use.
I want to create a listing that will only display PLR products, so I will go to the "Terms" tab and select the appropriate term.
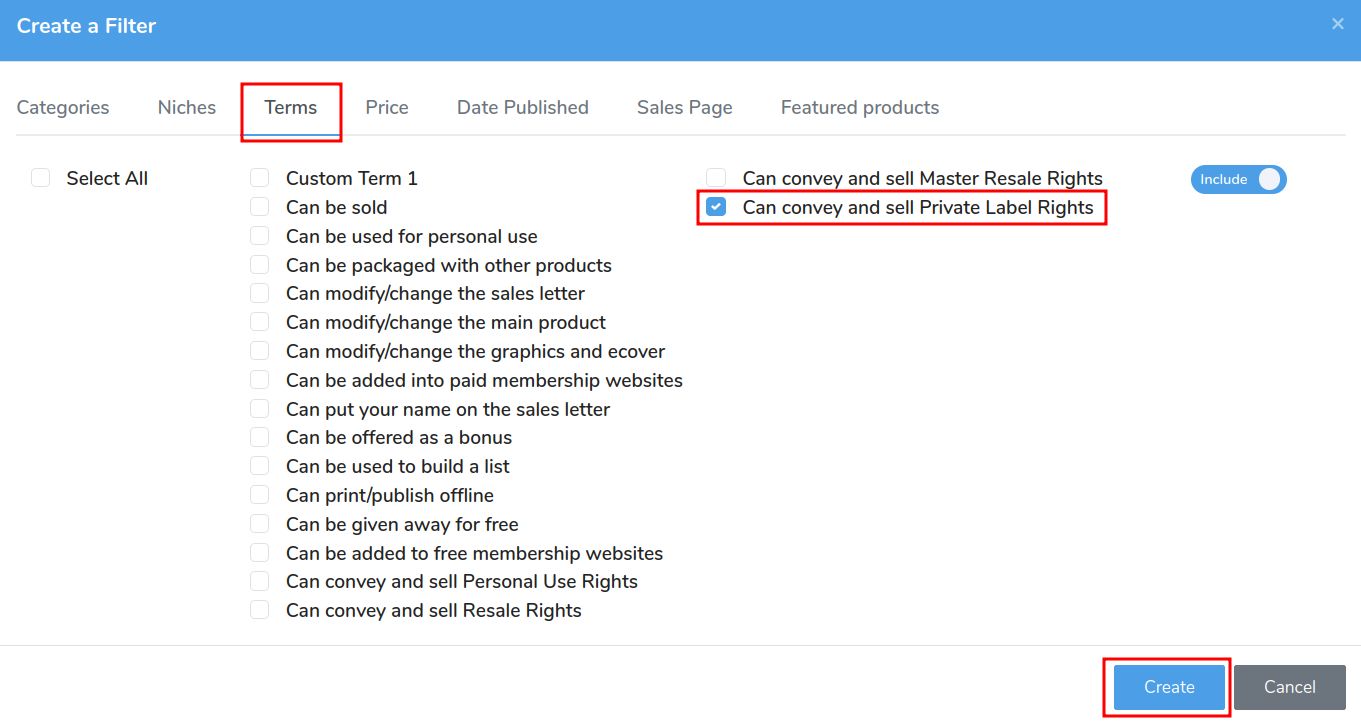
Note that you can combine items from multiple tabs, so you can for example select a couple of terms, a category and a niche and use that to filter the products. When you're done selecting the terms, click on the "Create" button.
Next, we check the "Save page with all products", and "Add new products ... automatically...".
We can see that the filter has found 1451 products. All of them will be put on this listing page. We leave paging, sorting, and limit options as default.
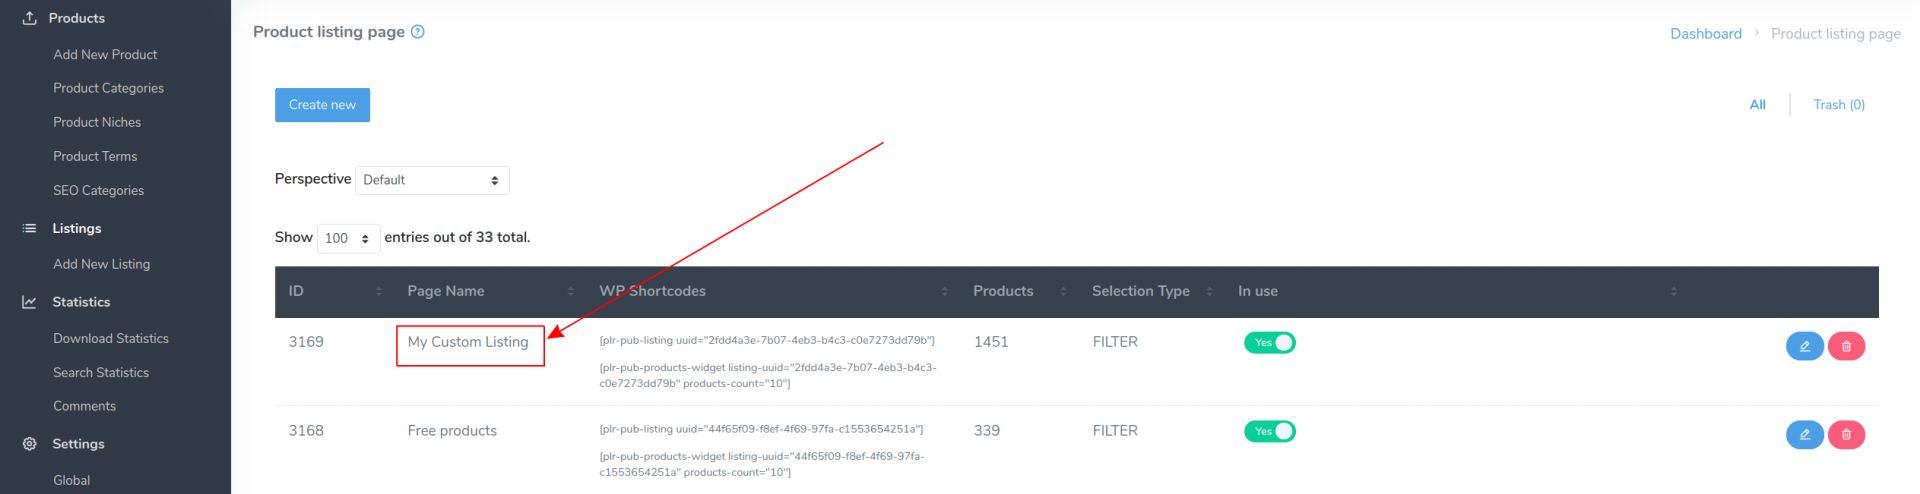
After we click save, our newly created listing will be visible in the table and it will be placed at the top since it is the newest listing.
Now, you can go to the WordPress main menu settings and add the "My Custom Listing" listing page to the main menu.
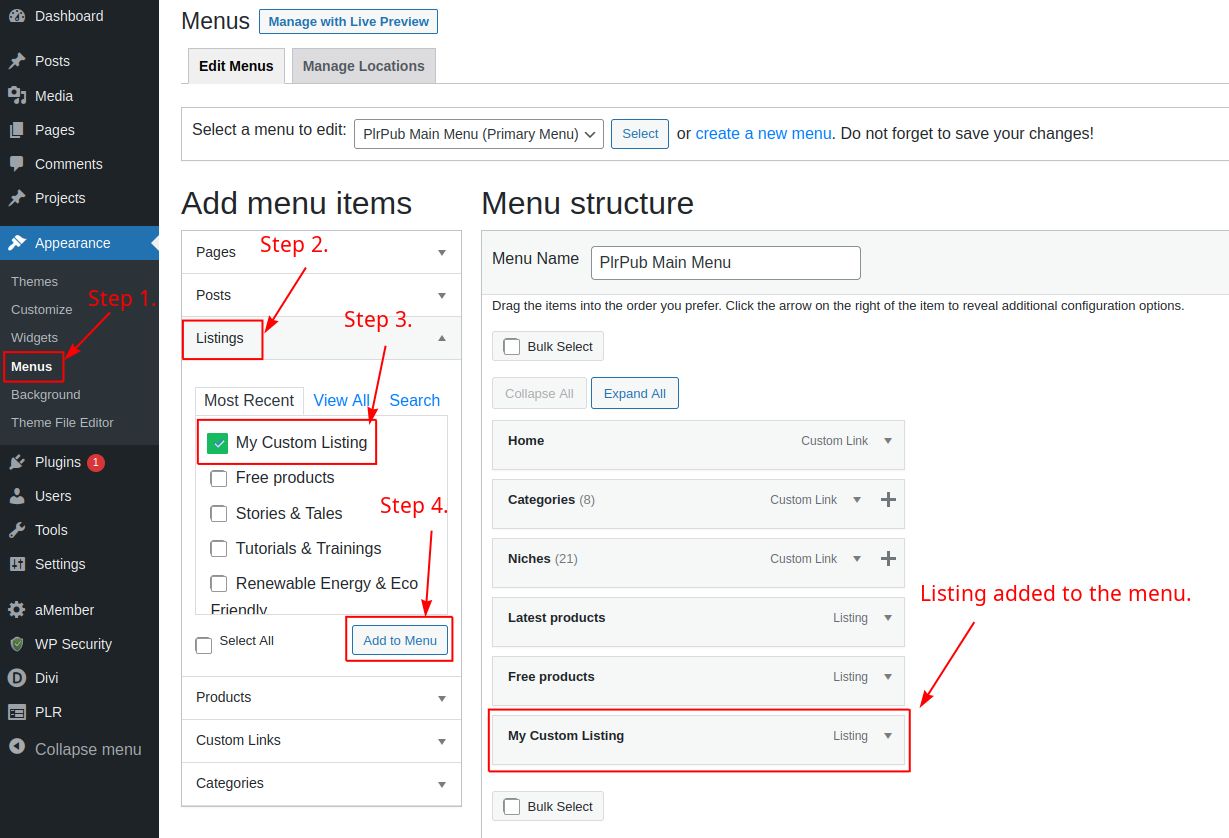
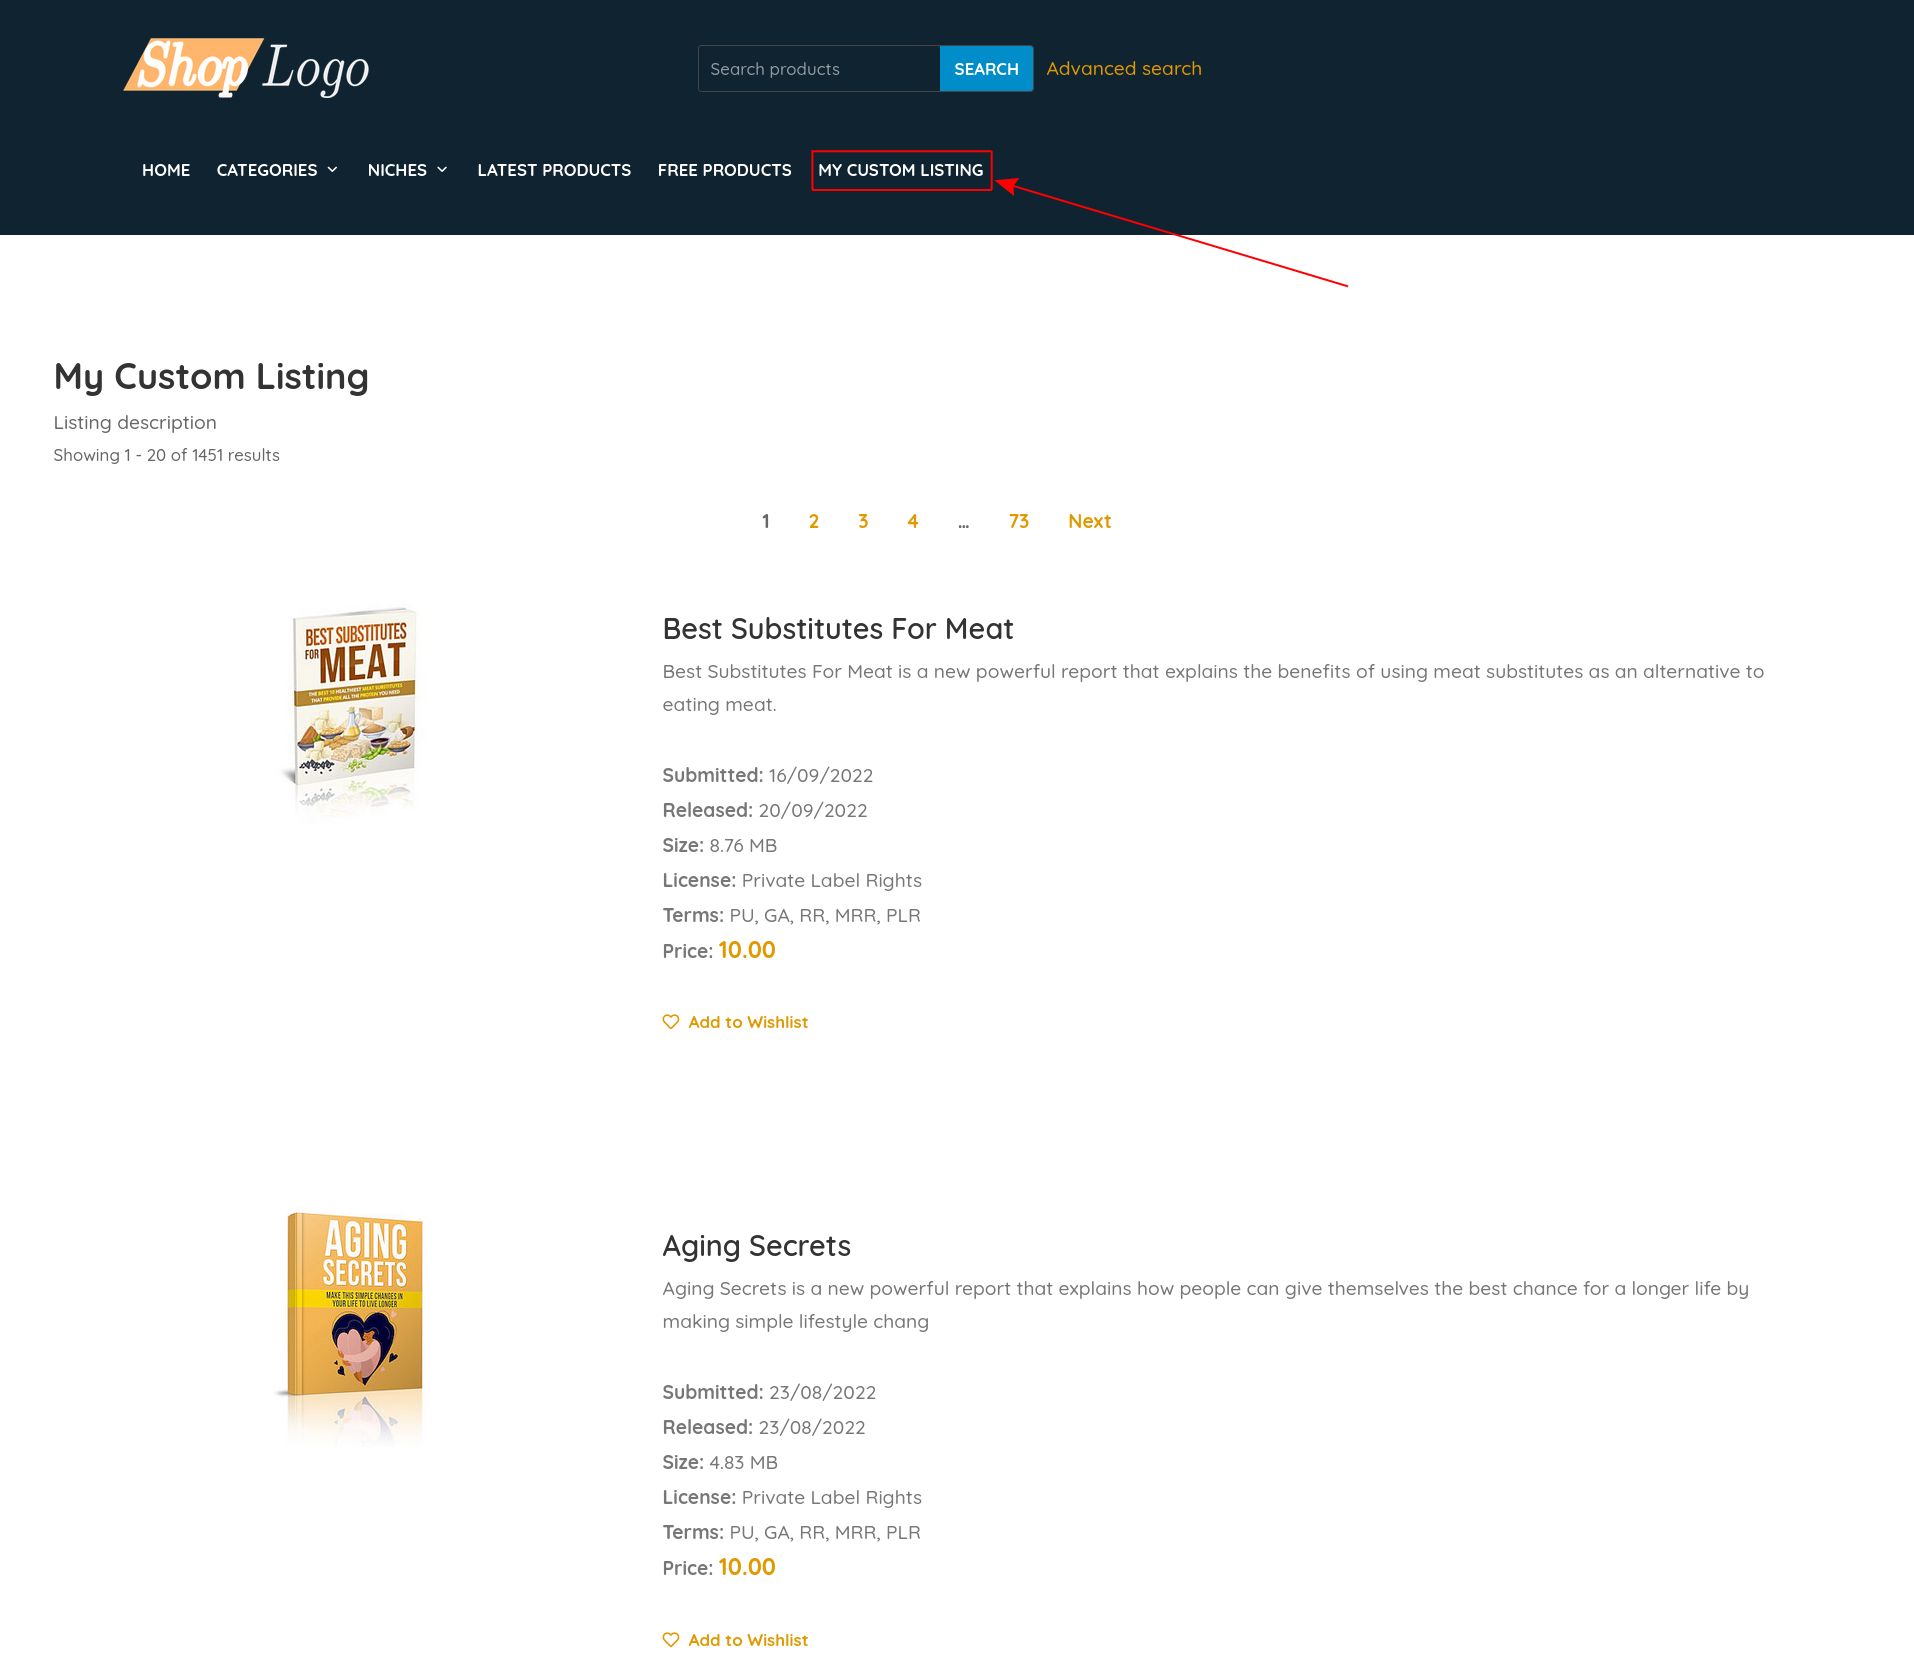
After you save the main menu settings, the newly created listing should appear in your website's header, and you can click on it and check to see the products inside.
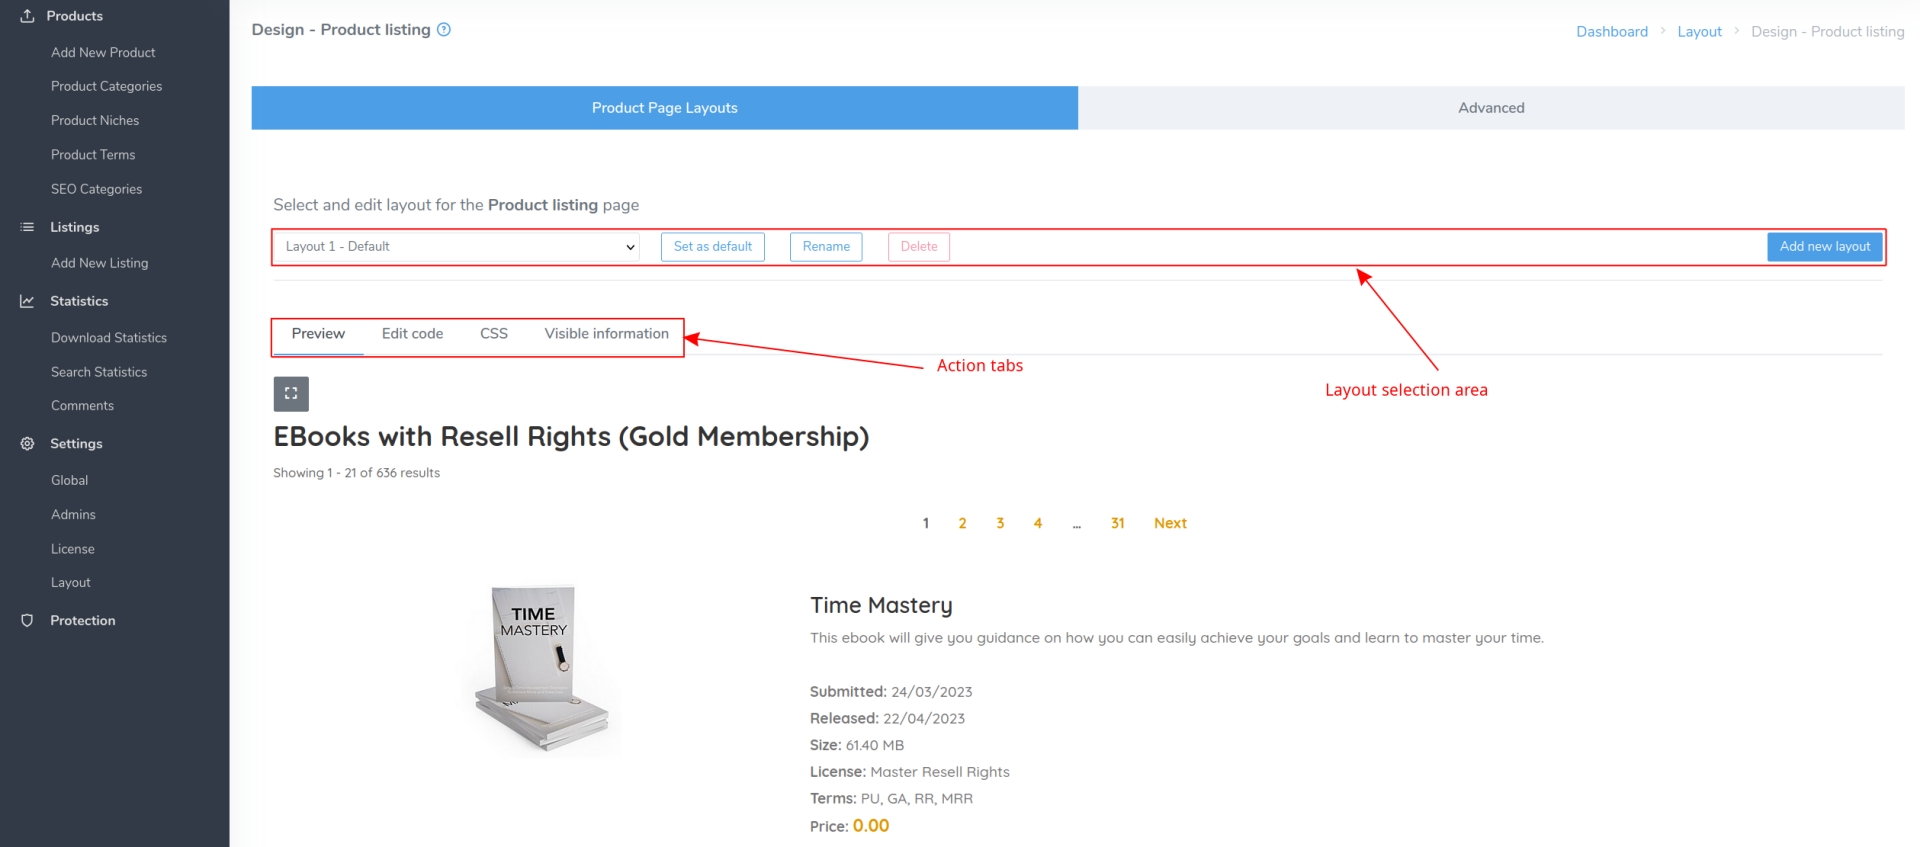
The listing page layout determines how the products are presented to the end users on the product listing pages.
You can change the layout and the information visible on the listing page via the administration page by clicking on the "Layout" sidebar menu entry and then clicking the little pen icon next to the "Product Listing" layout area.

You'll be greeted by the main editing screen, which is split between "Layout selection area" and "Action tabs".
In layout selection area, you can select between 5 different layouts already created for you. Each layout can be renamed/deleted, so you can organise them in way it makes sense for you.
To change the currently active layout, click on the "Set as default" button. This will apply the layout to ALL of the listings across the website.
To add your own custom layout, click on the "Add new layout" button on the right.
Each individual layout has its own set of "Action tabs", which allow you to modify the look and feel of each layout. This means that if you currently have "Layout 1" selected, any changes you make will only be applied to that layout. This allows you to create multiple unique layouts which you can then toggle between with a single button click.
The action tabs currently consist of:
- Preview - a live preview of the changes you're making
- Edit code - here you can edit a source code of a layout. A knowledge of HTML, CSS and Bootstrap is required
- CSS - you can add your own custom CSS here, which will only be applied to the selected layout
- Visible information - show/hide different fields on the listing page
You can learn more about layouts and layout areas at the "Website look and feel" section, under the "Product Page Layouts" sub-section.
In the examples above, we are changing the global layout, meaning it will be applied to the entire website. But what if we want to change the layout of a single listing page? If you have explored the listings a bit, you'll have noticed there is a listing named "Latest products (homepage)". This listing is a live example that has a layout different than all other listings, with 3 products in a single row. Here's how to do that.
The first step is to go to the listings page by clicking on the "Listings" in the menu, and then click on the edit icon next to the listing you want to modify.
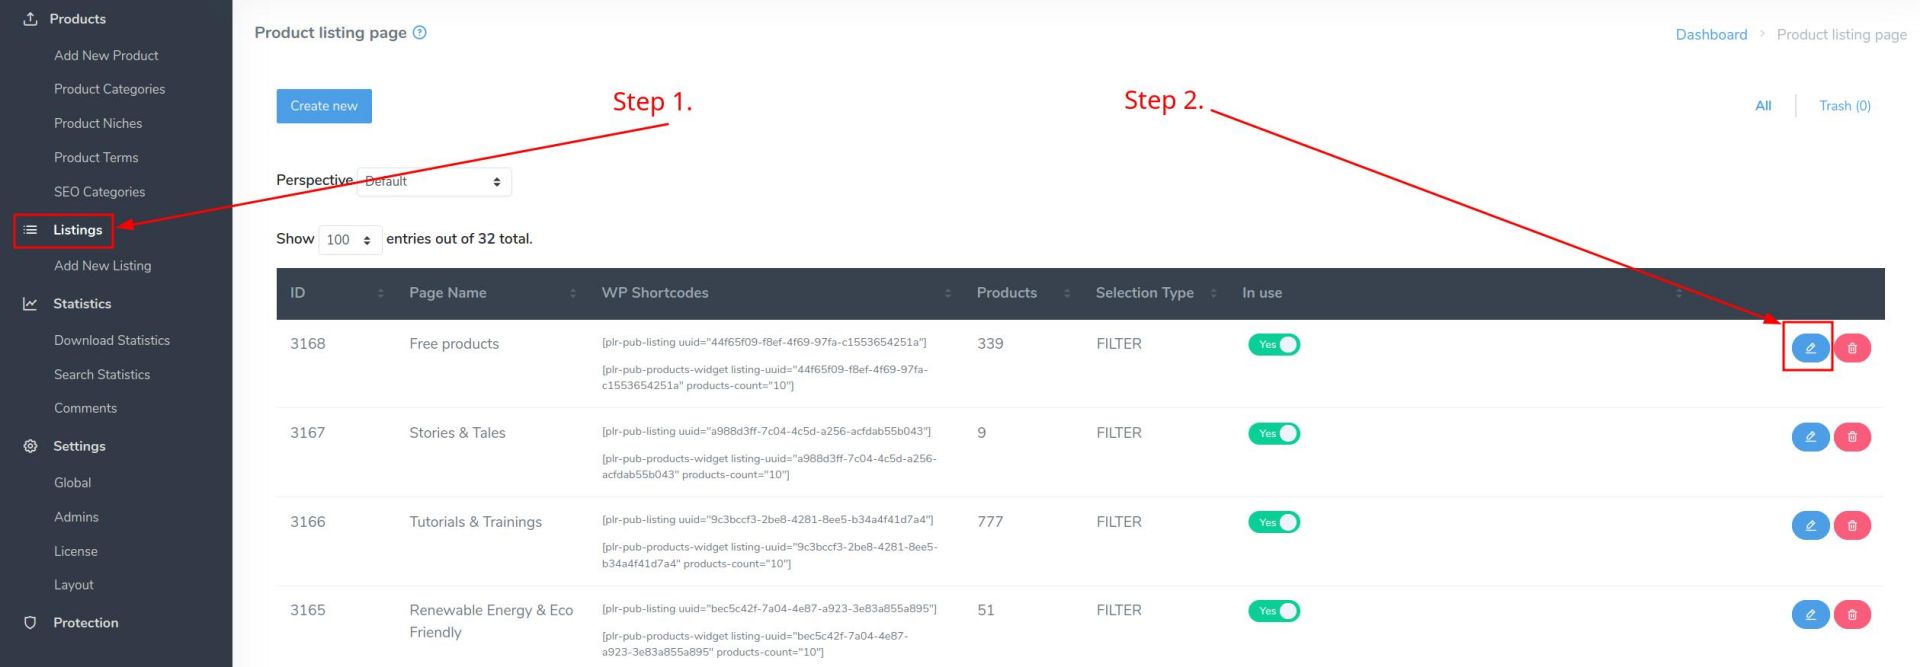
After that, scroll down a bit until you get to the "Listing page layout" dropdown menu on the right side of the screen.
Select the layout that you wish to use and click on the "Save" button to apply your modifications.
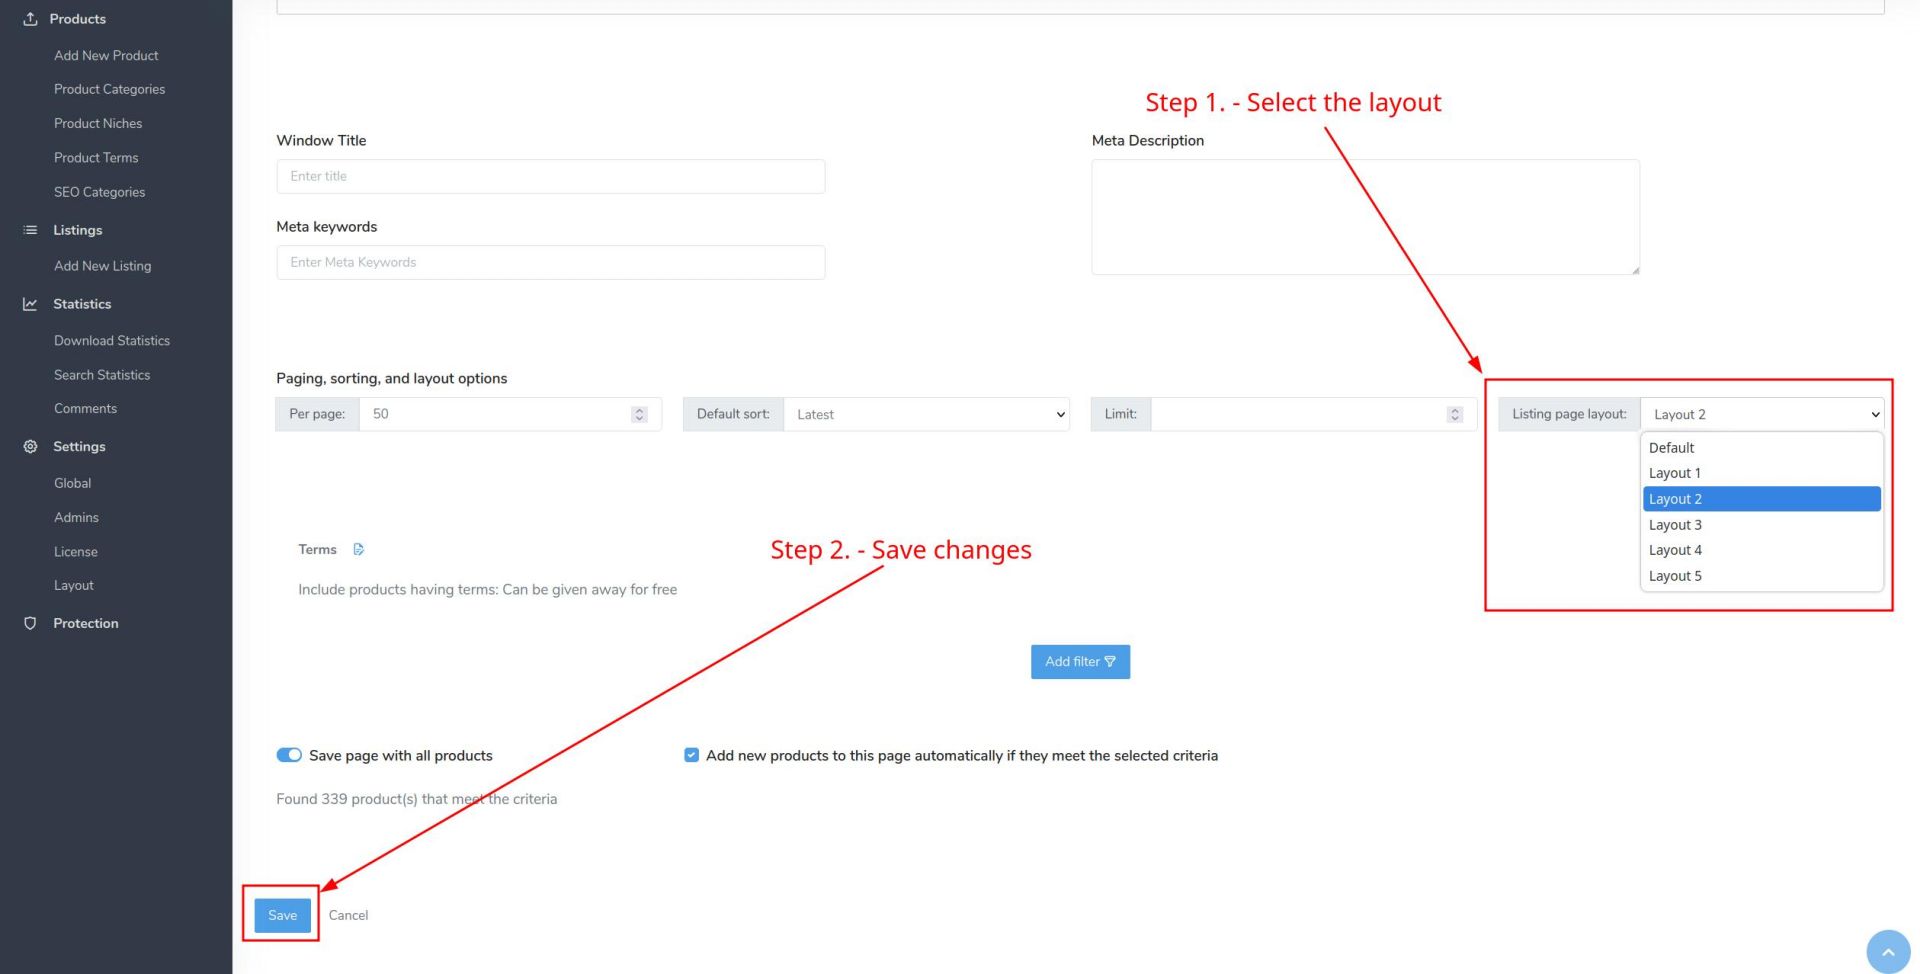
Your changes should now be applied. Let's see how it looks on our website.
This is how all of the other listings look like (we're taking "Latest products" as example):
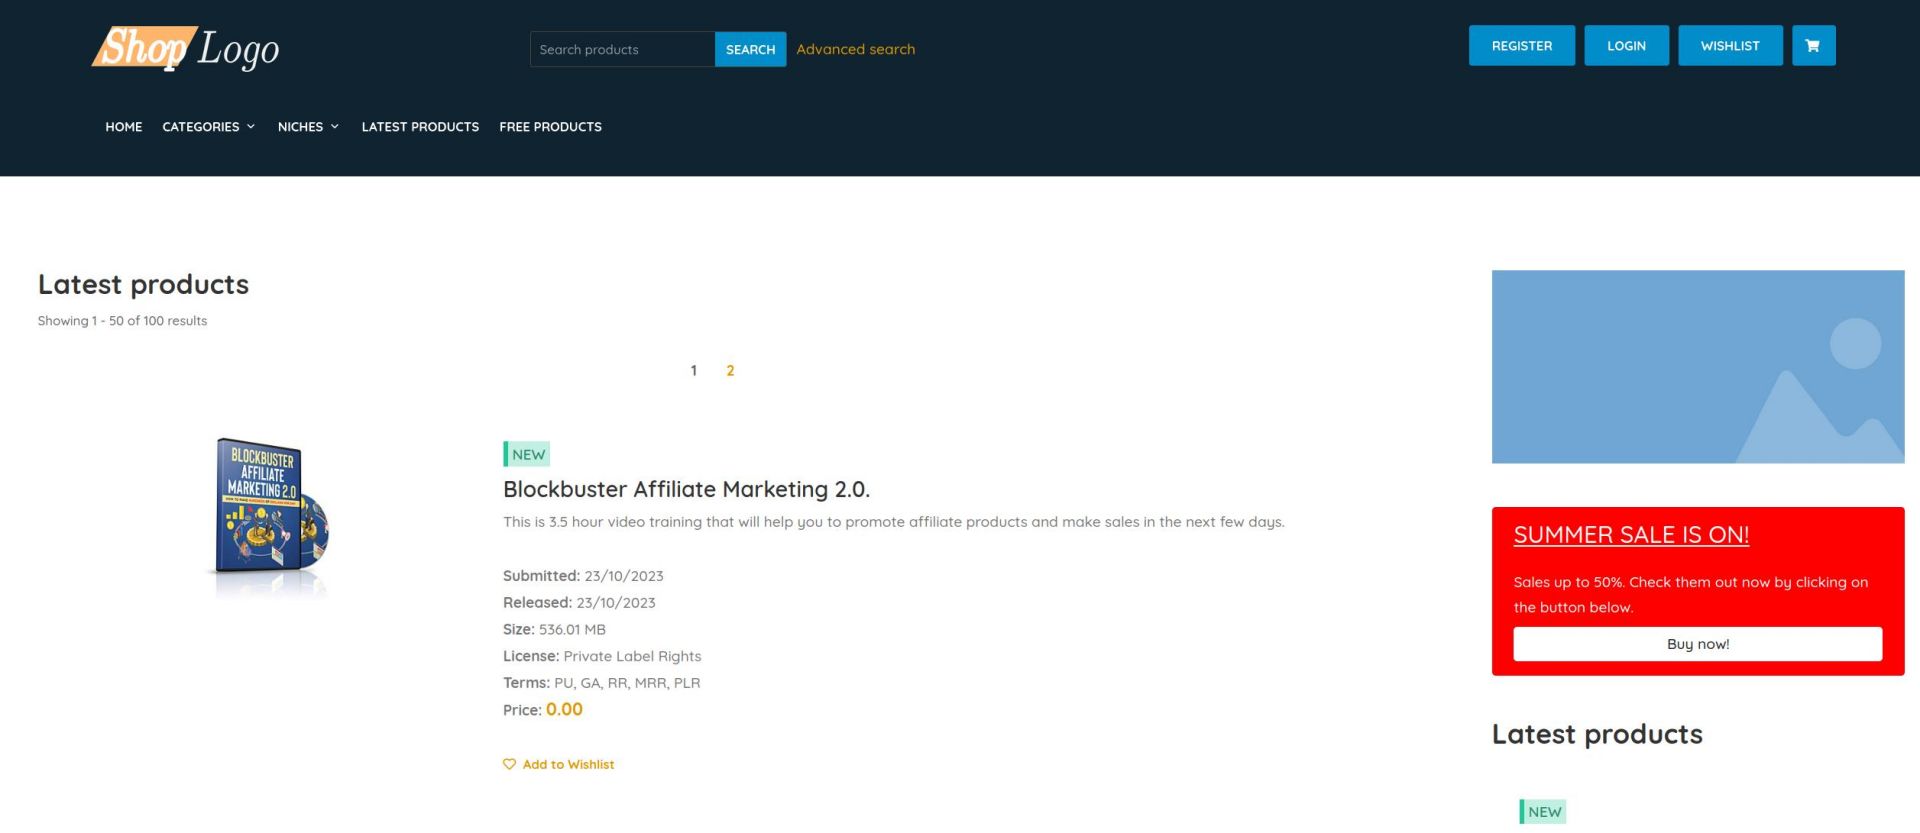
As you can see, there is an image to the left and there is only a single product in a row. Now let's see how the "Free products" layout looks, since that's the one we modified:
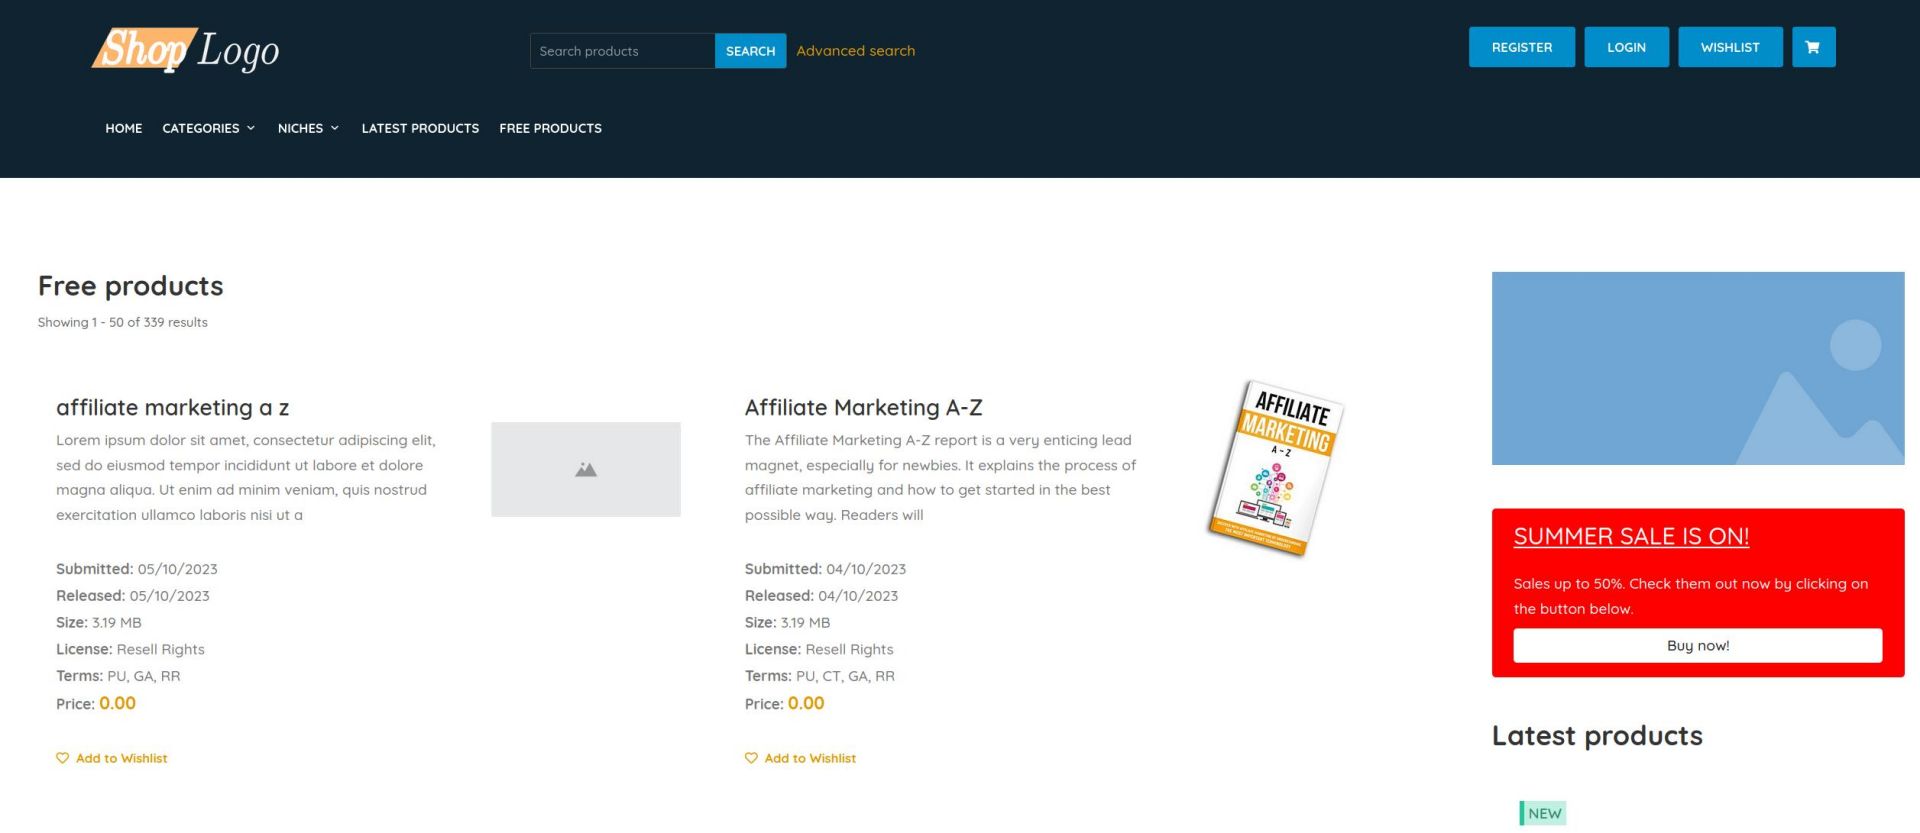
There's an image on the right of the text, and there are 2 products in a row. That means our changes have been applied.