MemberShops Documentation
Membership plans & protection
Membership plans & protection
Now that we have listing pages, we are going to create membership plans your users will have to subscribe to in order to download and/or preview products.
Please note that beside membership plans (subscriptions which your users need to purchase to be able to download the products), your shop also supports shopping cart which allows users to purchase products without subscribing to the membership.
In order to create a membership plan, we have to log in to the aMember administration page which is already installed for you when you've installed the WordPress plugin. Open the https://your-domain/members/admin. Substitute "your-domain" with your real domain name where you've installed WordPress. For example, if your domain is myplrstore.com then the aMember admin URL will look like this https://myplrstore.com/members/admin.
Your login credentials are either provided to you directly or sent to you via an email.
When you log in to the aMember admin area, click on the "Manage Products" sidebar menu.
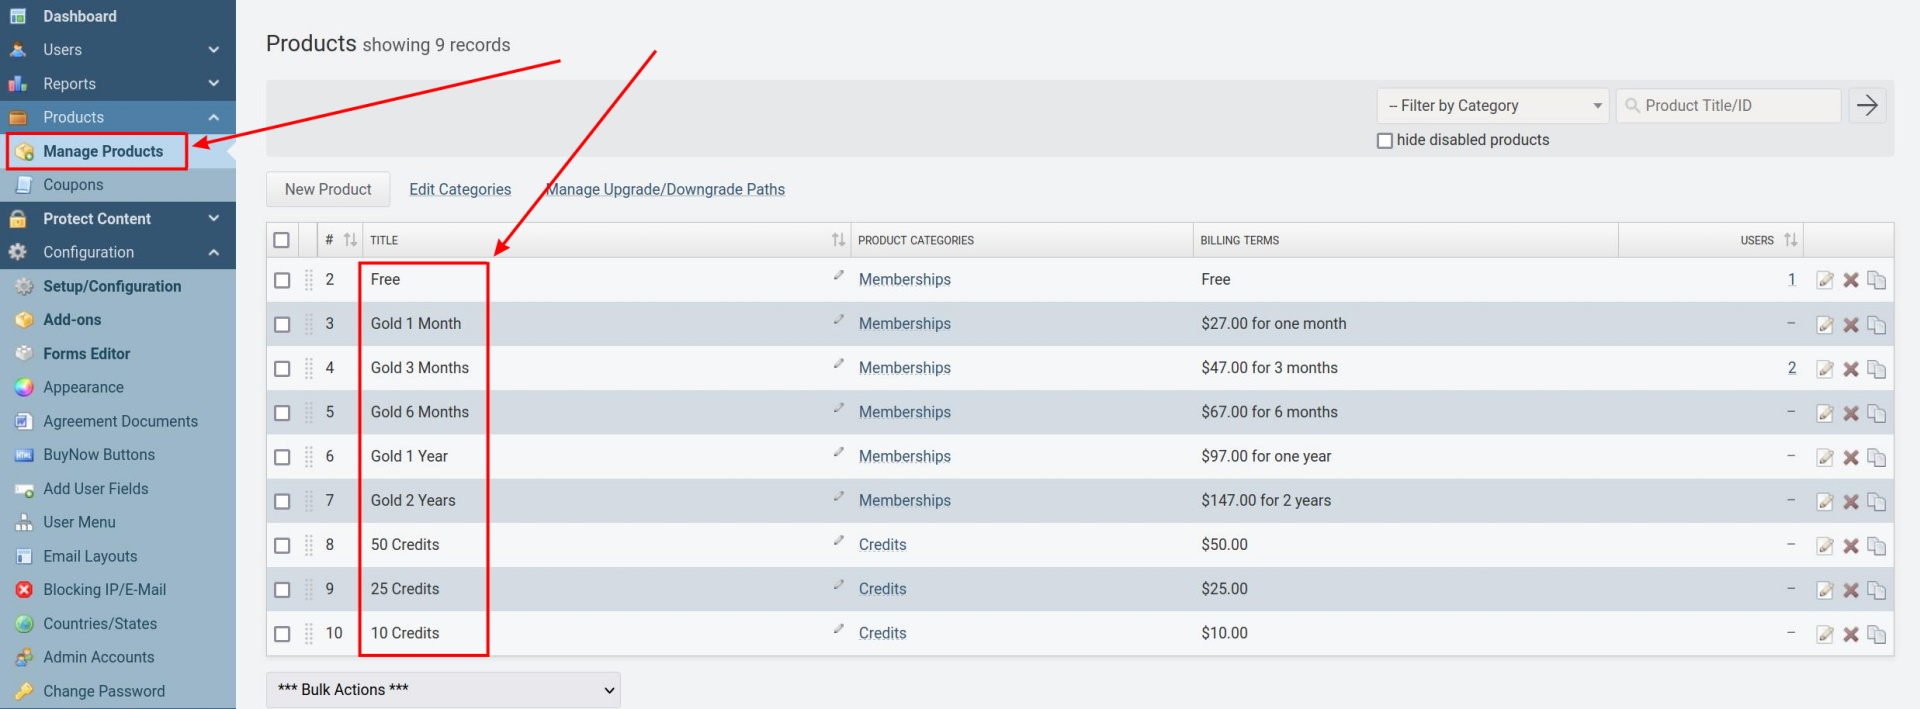
There, you'll see already created plans you can modify. You can delete all of them, create new plans from scratch or you can modify existing ones and put your desired prices, and periods.
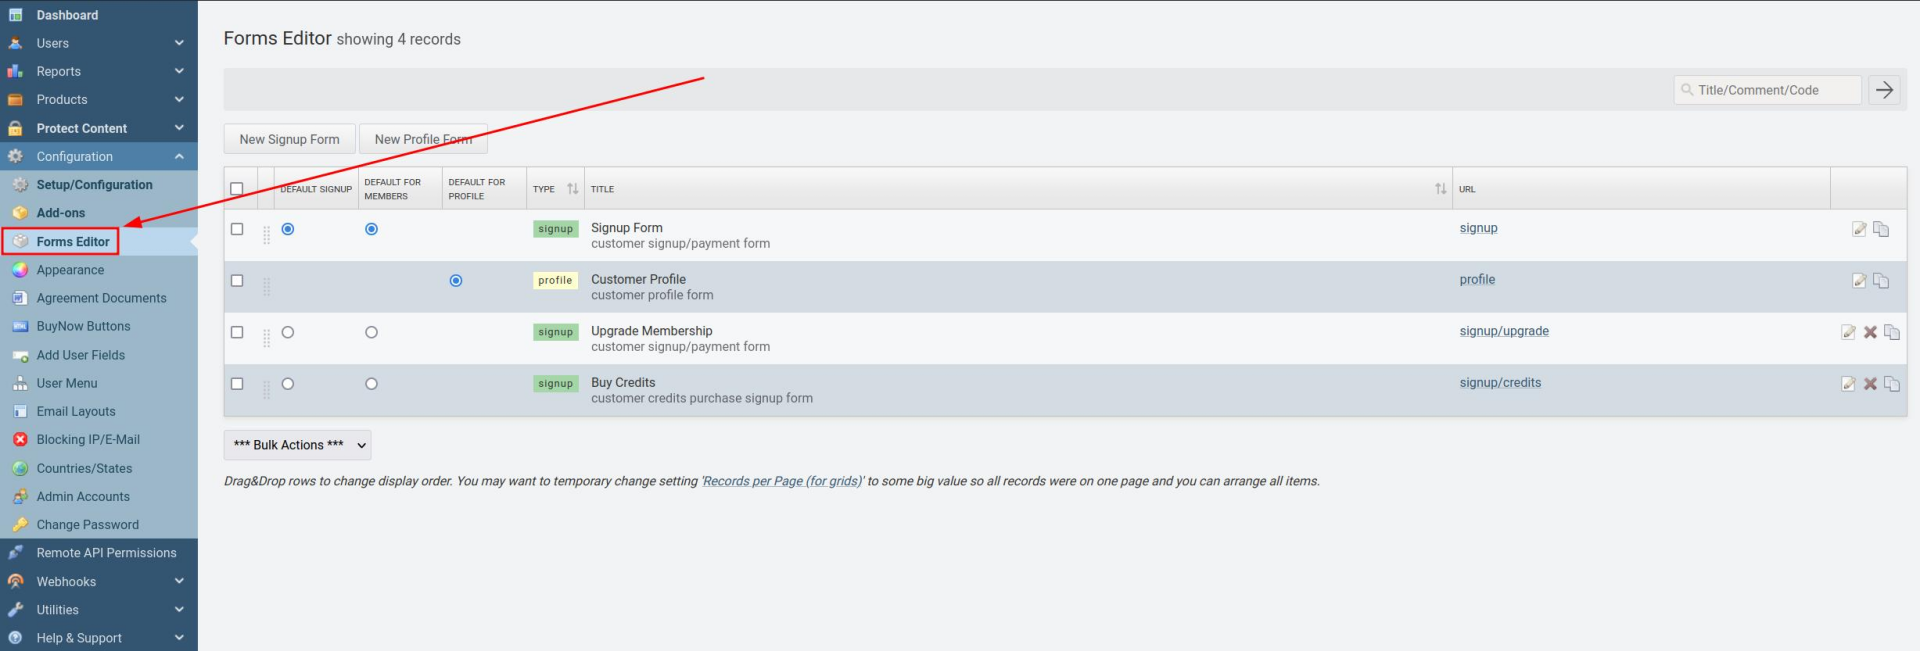
Your aMember installation already comes with a created signup page which contains all the memberships that are created during the installation and described in chapter 2.2. Creating membership subscriptions. Users can choose between the memberships and fill in the rest of the information.
There are 2 additional signup form as well, one is there for membership upgrade and the other one is for credits purchase. The upgrade membership form appears in user's members' page and is very similar to the default signup form included, however it doesn't contain the "Free" membership.
The credits form is self-explanatory - it contains all 3 credit packages that come with the installation.
| /members/signup | The general signup page with all the memberships |
| /members/signup/upgrade | Upgrade membership signup page |
| /members/signup/credits | Buy credits signup page |
Signup pages and forms can be managed on the aMember administration page if you click "Configuration", and then the "Forms Editor".
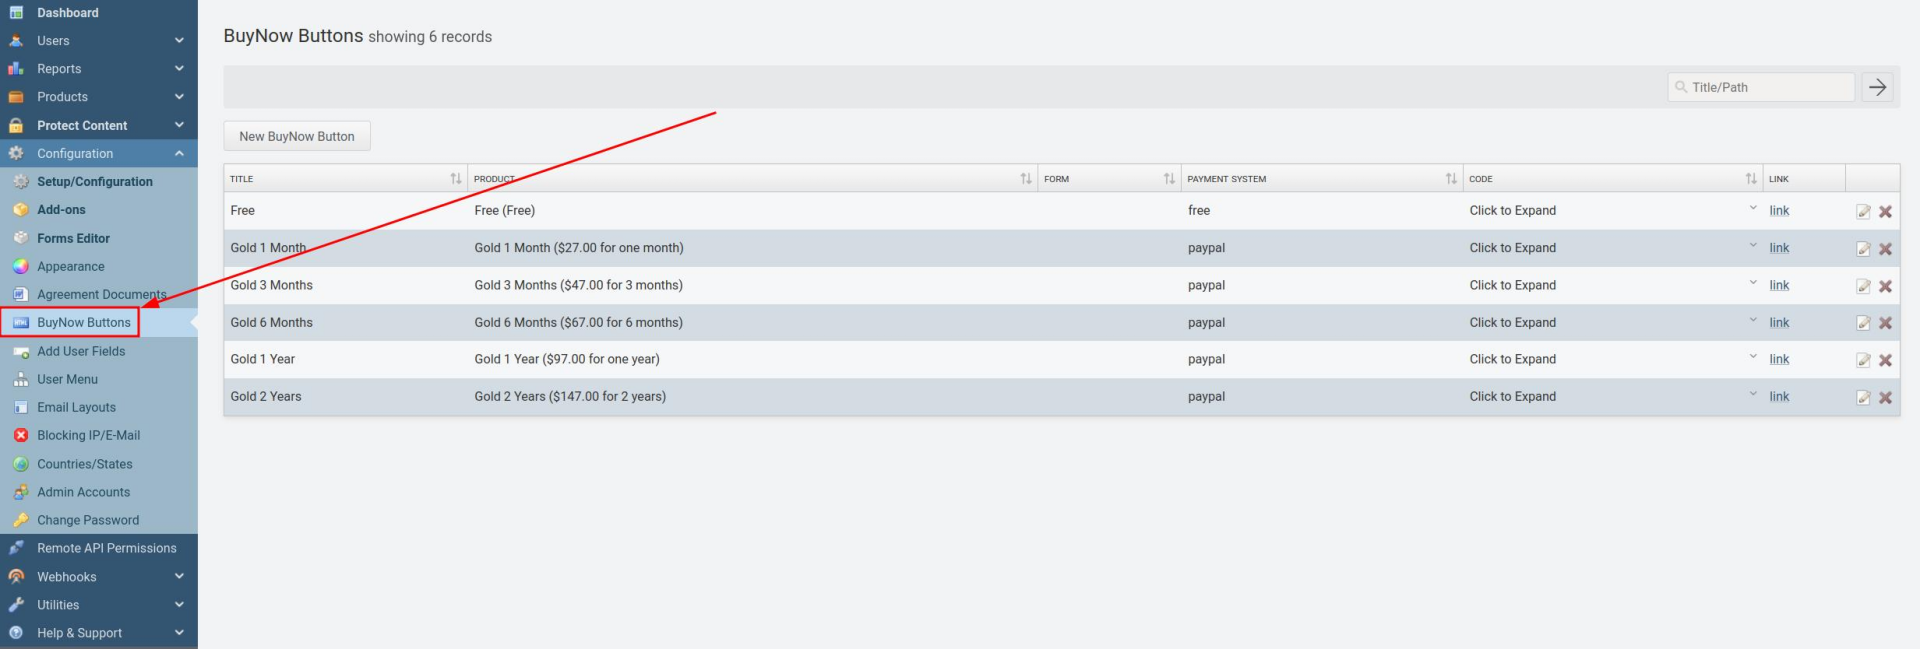
In addition to the signup forms, each membership plan includes the pre-created "BuyNow" buttons. They allow users to purchase a specific membership plan without navigating through the full signup process, which is perfect for those who've already made up their minds.
Thus, we have the following BuyNow buttons and their URL:
| /members/buy/free | Free membership BuyNow button |
| /members/buy/gold1month | 1 month Gold membership BuyNow button |
| /members/buy/gold3months | 3 months Gold membership BuyNow button |
| /members/buy/gold6months | 6 months Gold membership BuyNow button |
| /members/buy/gold1year | 1 year Gold membership BuyNow button |
| /members/buy/gold2years | 2 years Gold membership BuyNow button |
BuyNow Buttons can be managed on the aMember administration page if you click "Configuration", and then "BuyNow Buttons":
There is also a special registration page created named "Pricing", which is the page where users go once they click on the "Register" button in the header.
| /pricing | Pricing page |
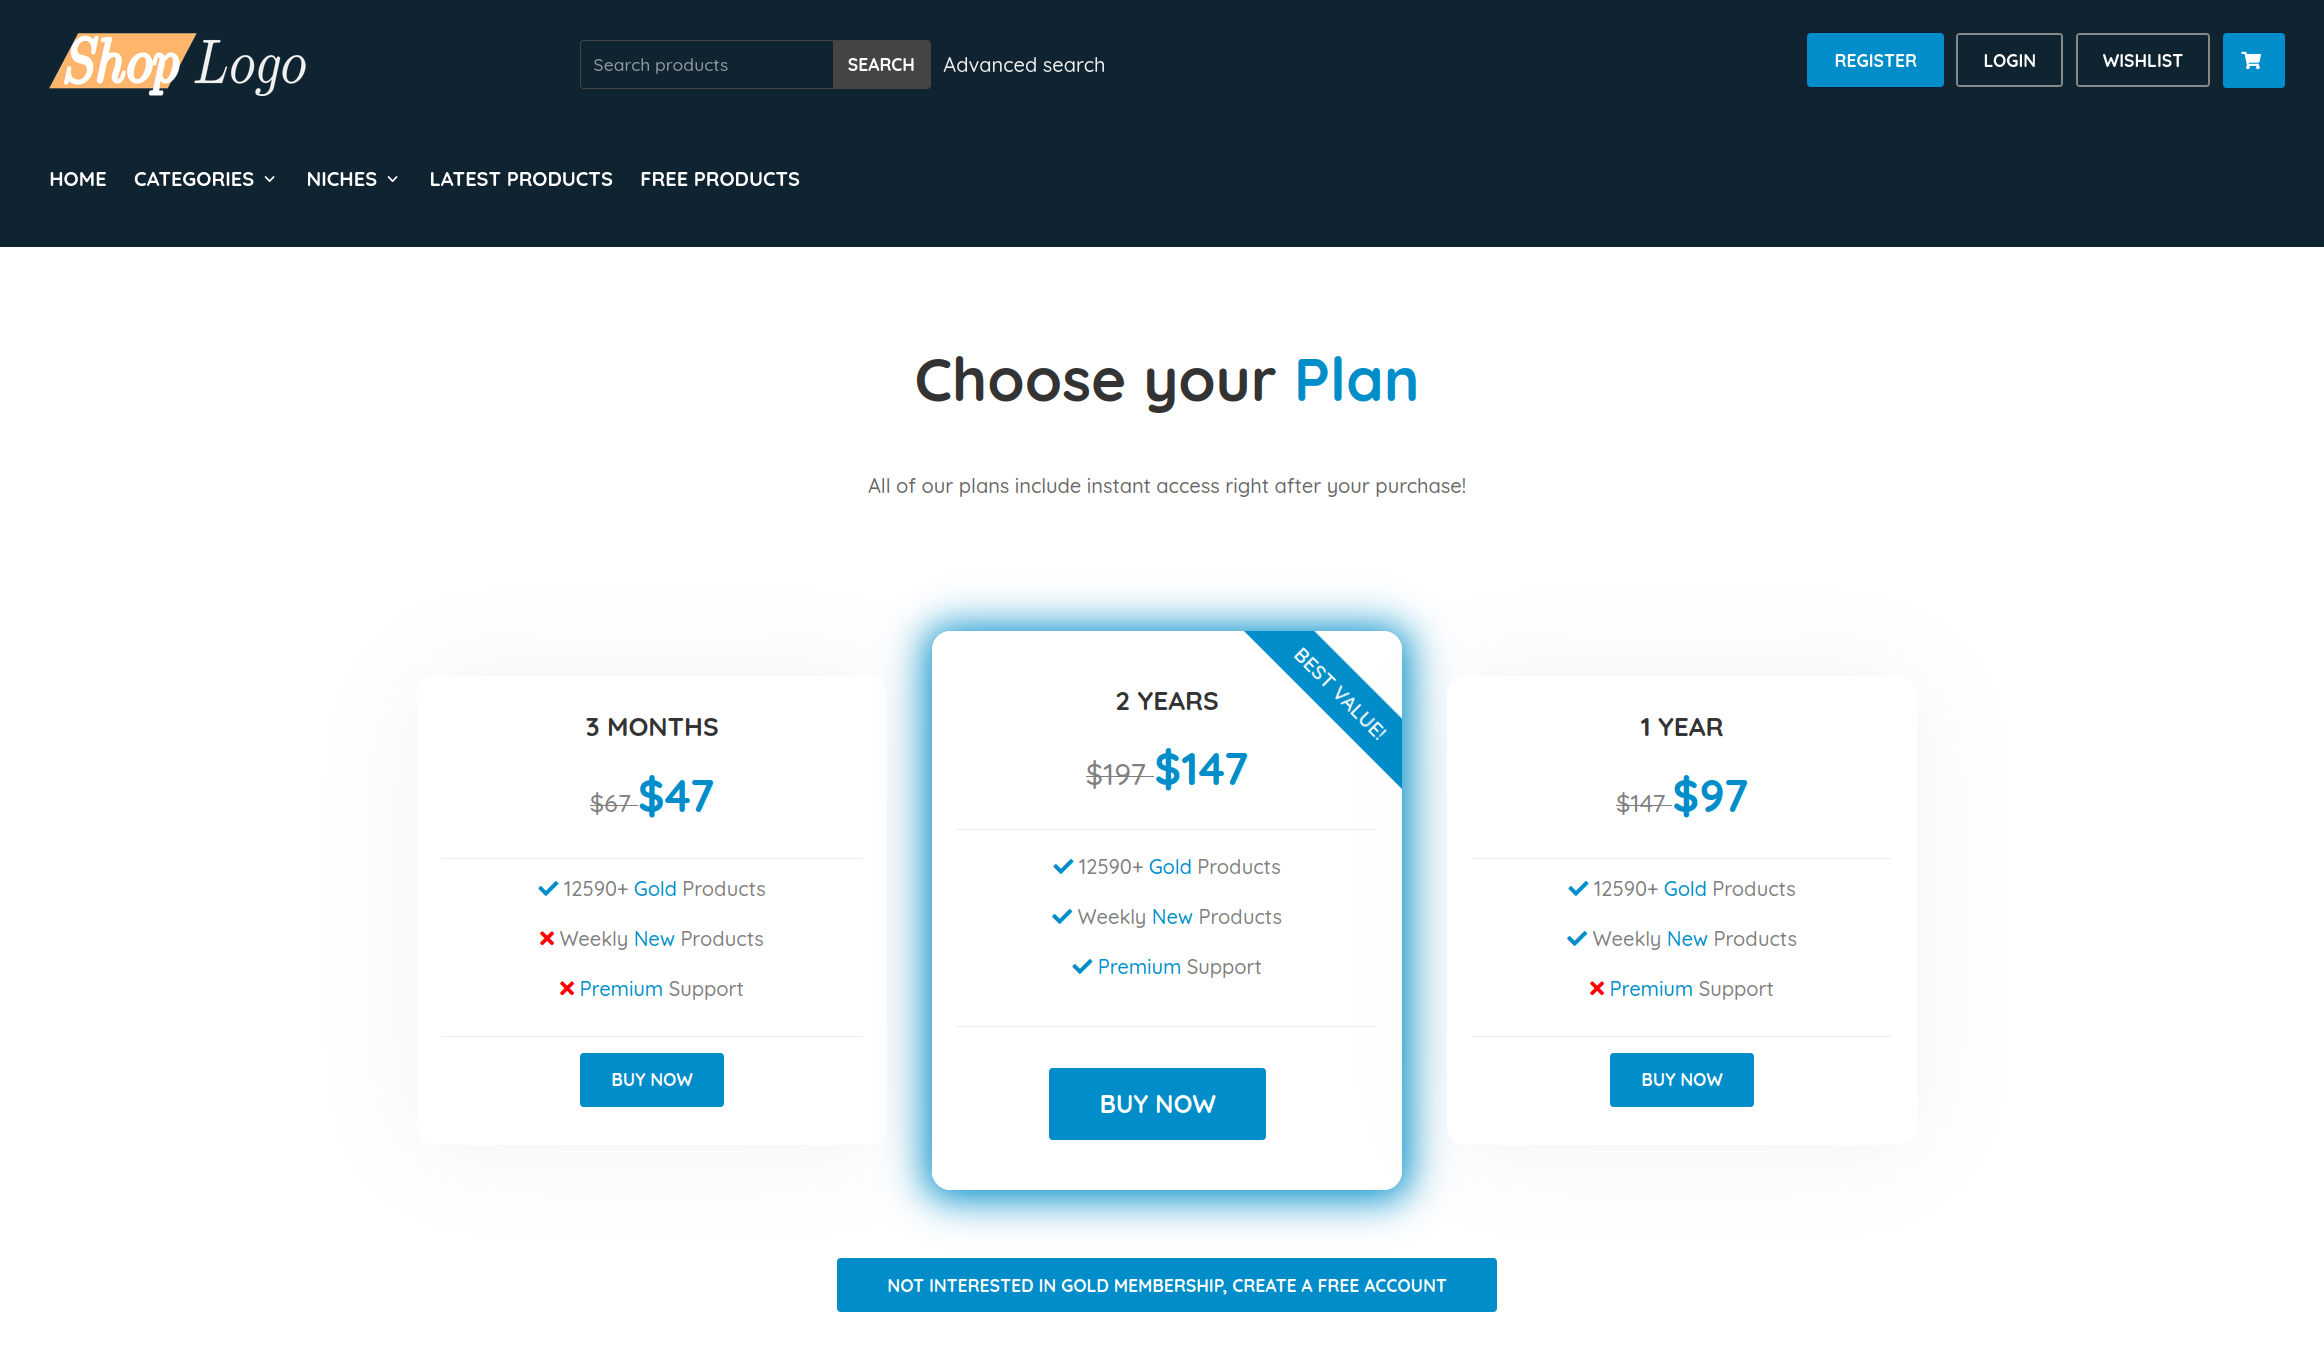
That page contains 3 pre-created payment plan options, which are directly connected to the created BuyNow buttons mentioned above. So for example, "Buy Now" button underneath the "2 Years" option points to the "2 years Gold membership BuyNow button" in aMember, as mentioned in the table above.
There is also a free registration button that leads to the "Free membership BuyNow button" of aMember.
Those are only our pre-created options and you can modify them in any way you want. Whether that is completely removing them, adding more payment plans or anything else that you may think of, that is completely up to you.
Once you're done editing the subscription plans, you open the plr.pub administration area and click on the "Protection" sidebar menu. The first thing to do is to click the "Fetch memberships" button in order to pull all the subscriptions defined in the membership administration area.
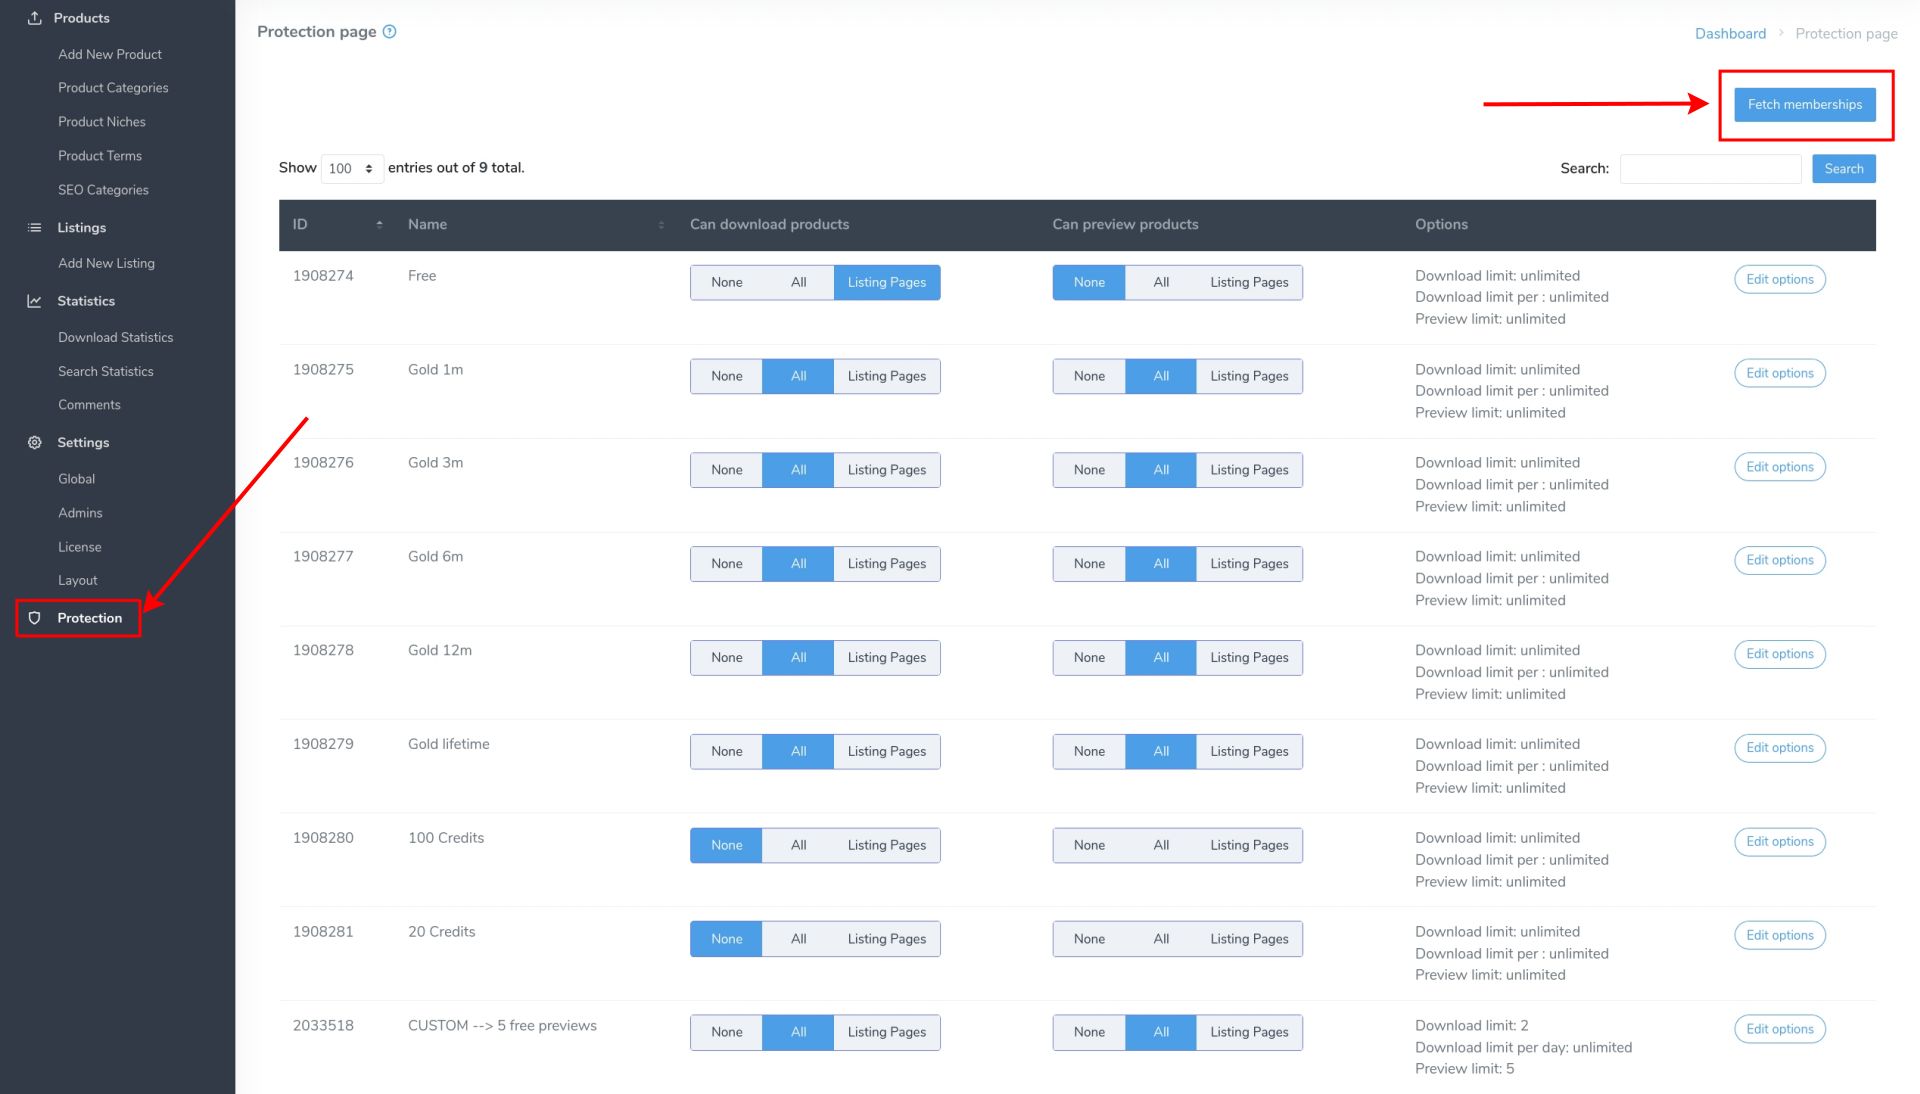
You will be greeted with 3 main columns:
- Can download products - this column defines which memberships have access to DOWNLOAD products
- Can preview products - very similar as the one above, except this column defines which memberships have access to PREVIEW products
- Options - here you can set different limits
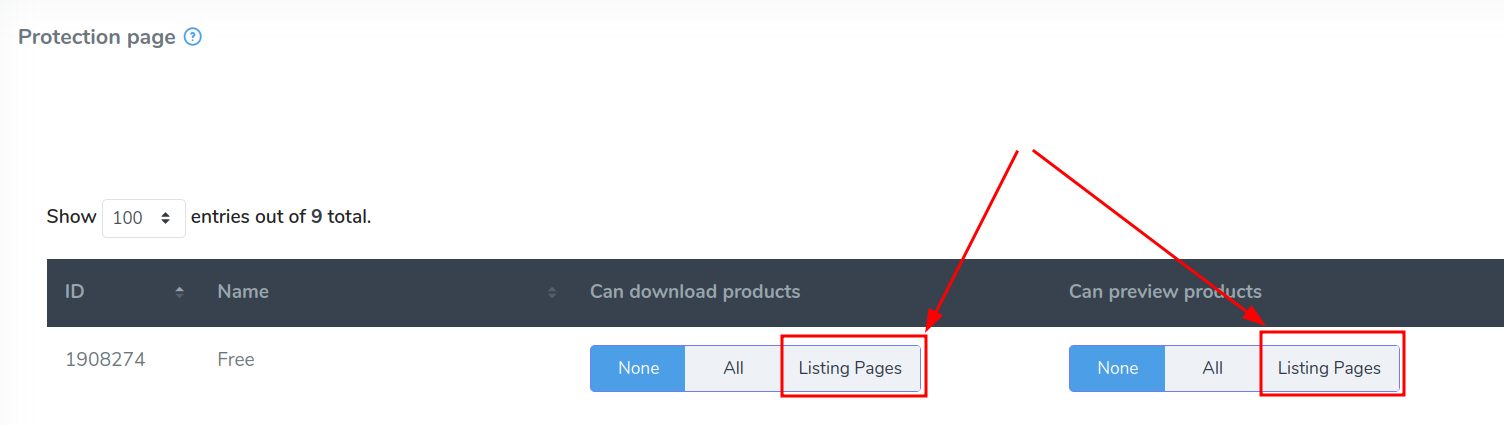
Regarding the former 2 columns, these allow you to define the access level the users with certain memberships will have. You can define that given membership will give access to none, all, or products contained in certain listing pages.
Let's say we have created a "Free products" listing page, and we want to give our Free membership users access to those products only. We click on the "Listing Pages" button and select the "Free products" listing page. This way, the free users will only be able to download products add to this listing page.
We want to do the same for the product preview.
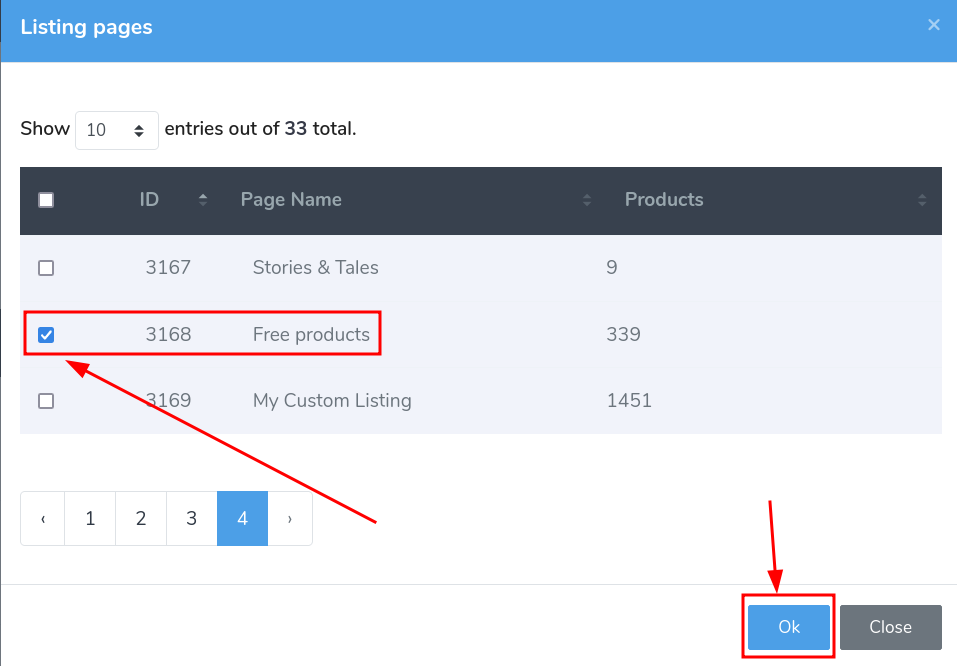
Now, free users will only be able to download and preview the "Free products" listing. If you want to allow your free users to download products from multiple listings, simply select the checkmark near all of them and confirm.
The memberships also have options to give users access to preview product files and to define a download limit. In order to change options click the "Edit options" button.

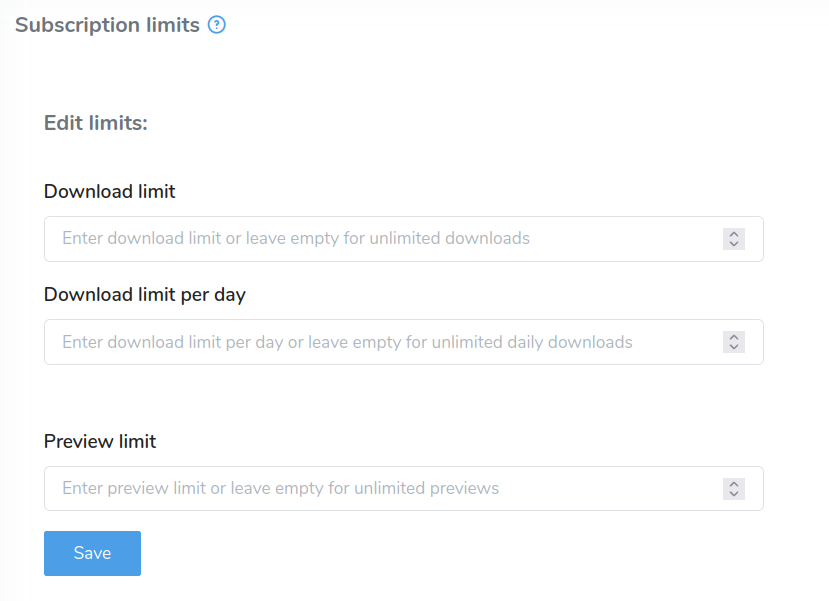
If the download limit is not set, it means the download is unlimited. If you set the limit to a certain value, it means the user will be able to download that many products, and later it will show the limit is reached message. The same thing applies to the daily download limit and the preview limit.